
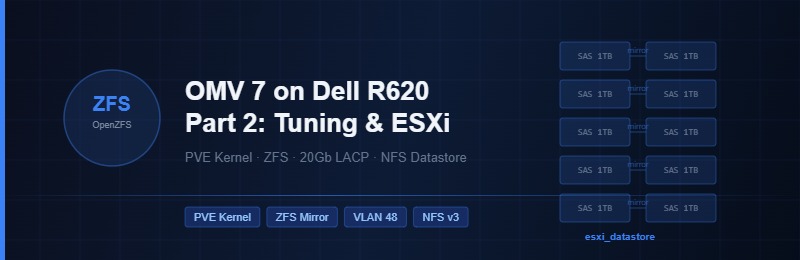
Part 1 got OMV installed and running on the R620. This part covers everything that turns it into a high-performance ZFS storage server feeding ESXi over a 20Gbps LACP bond — kernel replacement, network config, ZFS pool creation, NFS export, and ongoing monitoring.
The R620 has 384 GB of DDR3 — most of that becomes ZFS ARC (RAM cache). With 10 SAS drives in 5 mirrored pairs and sync writes disabled, this box absorbs VM write spikes almost entirely in memory.
Phase 2 — Kernel Preparation and ZFS
Replace the stock Debian kernel with the Proxmox PVE kernel for native ZFS supportStep 2.1 — Enable OMV-Extras
ZFS and kernel management are community features outside the default OMV repo. SSH in as root and run:
wget -O - https://github.com/OpenMediaVault-Plugin-Developers/packages/raw/master/install | bashStep 2.2 — Install the Kernel Management Plugin
In the OMV Web GUI, go to System → Plugins, search for kernel, and install openmediavault-kernel. Wait for the terminal window to confirm completion.
Step 2.3 — Install the Proxmox PVE Kernel
- Go to System → Kernel.
- Click the Proxmox “P” icon (Install Proxmox Kernel) in the toolbar.
- Select version
6.17(or the latest-pvelisted) and click Install. Do not close the window until it finishes.
Step 2.4 — Set Default Kernel and Reboot
- In System → Kernel, find the
-pveentry and click the checkmark icon to set it as default. - Reboot from the power menu top-right.
Step 2.5 — Verify and Install ZFS Plugin
- After reboot, confirm the
-pvekernel has a checkmark in the Running column. - Go to System → Plugins, search
zfs, install openmediavault-zfs. - Hard-refresh (Ctrl+F5) — a ZFS menu should now appear under Storage.
Phase 2 Checklist
- OMV-Extras installed successfully
- Running kernel ends in
-pve - ZFS menu visible under Storage in the sidebar
Phase 3 — Network and 10Gb Optimization
20Gbps LACP bond on the X520 ports with VLAN xx and 9000 MTU end-to-endStep 3.1 — Create the LACP Bond
- Go to Network → Interfaces → Create → Bond.
- Name:
bond0. Slaves:eno1andeno2(the 10GbE X520 ports). - Mode:
IEEE 802.3ad LACP. Transmit hash policy:layer2+3. MTU:9000. - IPv4: Disabled. Save and Apply.
Step 3.2 — Create the VLAN xx Interface
- Create → VLAN. Parent:
bond0. VLAN ID:48. MTU:9000. - IPv4 Static:
x.x.x.100/x.x.x.x. Leave gateway and DNS blank. - Save and Apply.
Step 3.3 — Force LACP Fast Rate
OMV defaults to slow mode (30s heartbeats). Force 1-second heartbeats to match the MikroTik:
ip link set bond0 down && echo 1 > /sys/class/net/bond0/bonding/lacp_rate && ip link set bond0 up

# Verify
cat /proc/net/bonding/bond0 | grep "LACP rate"
# Expected: LACP rate: fast
Step 3.4 — Persist LACP Fast Rate Across Reboots
Automate it via System → Scheduled Tasks → Create. Set execution to At reboot, user root, command:
ip link set bond0 down && echo 1 > /sys/class/net/bond0/bonding/lacp_rate && ip link set bond0 upPhase 3 Checklist
cat /proc/net/bonding/bond0showsSpeed: 20000 Mbpscat /proc/net/bonding/bond0showsLACP rate: fastping -M do -s 8972 x.x.x.1returns successful replies
Phase 4 — ZFS Pool and Performance Tuning
5.3TB usable pool across 5 mirrored pairs with RAM-backed write cacheStep 4.1 — Clear Old RAID Metadata
# Stop ghost arrays
mdadm --stop /dev/md126
mdadm --stop /dev/md127

# Wipe RAID superblocks
mdadm --zero-superblock /dev/sd[a-j]

# If drives still appear busy, force-wipe the first 100MB
for d in a b c d e f g h i j; do dd if=/dev/zero of=/dev/sd$d bs=1M count=100 conv=fdatasync; donelsblk first to confirm drive letters. Make sure your BOSS card OS disk is not in the sd[a-j] range before wiping.Step 4.2 — Create the Pool
zpool create -f -o ashift=12 esxi_datastore mirror /dev/sda /dev/sdb mirror /dev/sdc /dev/sdd mirror /dev/sde /dev/sdf mirror /dev/sdg /dev/sdh mirror /dev/sdi /dev/sdjashift=12 sets 4K block alignment for modern SAS drives. This cannot be changed after pool creation.Step 4.3 — Performance Tuning
# Disable sync — RAM becomes the primary write target
zfs set sync=disabled esxi_datastore

# Match ESXi VMDK block size
zfs set recordsize=64k esxi_datastore

# LZ4 compression — fast, typically saves 20-30% on VM data
zfs set compression=lz4 esxi_datastore

# Disable access time stamps
zfs set atime=off esxi_datastoreStep 4.4 — Increase the Dirty Data Write Buffer to 16 GB
nano /etc/modprobe.d/zfs.confAdd:
options zfs zfs_dirty_data_max=17179869184Then regenerate initramfs:
update-initramfs -uStep 4.5 — Register the Pool in OMV
- Storage → ZFS → Pools — Import
esxi_datastore. - Under the Datasets tab, create a filesystem named
esxi_dataset. Save and Apply. - Storage → File Systems — mount
/esxi_datastore/esxi_dataset. Save and Apply.
Phase 4 Checklist
zpool statusshows 5 mirror VDEVs, state: ONLINEzfs get sync,recordsize esxi_datastorereturnsdisabledand64K- Dataset
esxi_datasetlisted as Mounted in OMV File Systems
Phase 5 — NFS to ESXi
Expose ZFS storage to the ESXi host over the 10Gb storage VLANStep 5.1 — Create the Shared Folder
Go to Storage → Shared Folders → Create. Name: Datastore_NFS. File System: esxi_datastore/esxi_dataset. Relative Path: /. Save and Apply.
Step 5.2 — Configure the NFS Export
- Go to Services → NFS → Shares → Create.
- Shared folder:
Datastore_NFS. Client:x.x.0.0/16. - Extra options:
rw,no_root_squash,no_subtree_check,insecure - Save and Apply.
no_root_squash gives ESXi administrative control over its VM files. insecure allows ESXi to connect from high-numbered ports NFS would otherwise reject.Step 5.3 — ESXi Storage Network
- In ESXi, go to Networking → VMkernel adapters → Add VMkernel adapter.
- Port group: your 10GbE SFP+ port group. VLAN ID:
48. MTU:9000. - IPv4 Static:
x.x.x.10/x.x.x.x. Leave gateway blank.
Step 5.4 — Mount the NFS Datastore in ESXi
- Storage → New Datastore → Mount NFS datastore.
- Name:
OMV_ZFS_DATASTORE. NFS Server:x.x.x.100. - NFS Share:
/export/Datastore_NFS. NFS Version: NFS 3. Click Finish.
Phase 5 Checklist
- Datastore appears in ESXi with Normal status
vmkping -d -s 8972 x.x.x.100from ESXi SSH confirms the Jumbo path works- Creating a folder in the datastore from ESXi confirms NFS permissions are correct
Monitoring and Maintenance
ZFS Health and Monthly Scrubs
# Trigger a scrub
zpool scrub esxi_datastore

# Check pool health — state ONLINE, all error columns at 0
zpool status
Schedule scrubs in OMV under Storage → ZFS → Pools → Scrub Schedule.
ARC Cache Statistics
# Live cache hit rate — aim for 90%+
arcstat

# Real-time throughput per mirror pair, updates every 5s
zpool iostat -v 5
Bond and Network Health
cat /proc/net/bonding/bond0
# LACP rate: fast
# MII Status: up on both eno1 and eno2
UPS Integration
Because sync=disabled keeps writes in RAM, a hard power cut loses that buffer. Install openmediavault-nut and configure it under Services → UPS to shut down gracefully on low battery.
Performance Troubleshooting
- Jumbo frames broken? Run
vmkping -d -s 8972 x.x.x.100from ESXi. Failure means a switch port reverted to MTU 1500. - Pool too full? ZFS drops performance above 80% used. Check with
zpool list. - Dirty data limit active? Run
cat /sys/module/zfs/parameters/zfs_dirty_data_max— should return17179869184.
Next in this series
Part 3 — Dashboard & Monitoring →