
Applying a patch release to VCF is one of those tasks that looks intimidating on paper and is actually pretty manageable once you’ve done it a couple of times. The VCF 9.0.1.0 and 9.0.2.0 posts on this blog cover what changed in each patch release. This post covers how to actually apply them — the specific steps from “I know a patch is available” to “everything is running on the new version and I’ve verified it.”
I’m describing the process for a management domain patch. Workload domain patches follow the same flow but always go after the management domain is done.
Step 1: Check What’s Available
Log in to SDDC Manager and go to Lifecycle Management > Releases. If your SDDC Manager has internet access to the Broadcom depot, available patches will appear here automatically. The release list shows you the current version of each component in your environment alongside the latest available version.
If you’re running offline (no internet access from the management network), you won’t see available releases here until you upload the patch bundles manually. In that case, your process starts at the Broadcom Support Portal: download the release notes first to confirm the patch version and BOM, then download the patch bundles.
Always read the release notes before applying a patch. Specifically, check for any known issues that affect your environment, any prerequisites the patch has (for example, some patches require you to be on a specific prior version before the patch can be applied), and the supported upgrade path. The release notes for VCF patch releases are on Broadcom TechDocs and include the full BOM for the patched version.
Step 2: Download the Patch Bundles
For an online depot, SDDC Manager can download bundles directly. Go to Lifecycle Management > Bundle Management, select the patch release bundles, and click Download. SDDC Manager downloads them to its local depot in the background. This can take a while — the full bundle set for a VCF patch release is typically 10-20GB.
For an offline depot, download the bundles from the Broadcom Support Portal. You need four separate bundles: SDDC Manager, ESXi, vCenter, and NSX. Download them to a machine that has access to both the internet and your management network, then upload them to SDDC Manager via Lifecycle Management > Bundle Management > Upload Bundle.
SDDC Manager validates each bundle’s SHA checksum on upload. If a bundle fails validation, the file is corrupted and you need to re-download it. This is more common with large bundle files on flaky connections than most people expect — if the upload fails validation, always re-download rather than trying to re-upload the same file.
Wait for all four bundles to show status Available in the Bundle Management page before moving to the next step. Starting the patch workflow before all bundles are available will cause the pre-check to fail.
Step 3: Pre-Patch Checks
Before kicking off the patch via LCM, manually verify the health of your environment. LCM’s pre-check will catch most issues, but catching them yourself first means you’re not doing this verification under time pressure while the maintenance window clock is ticking.
Check vSAN health in vCenter — no red or orange items. Check NSX Manager cluster health — all three manager nodes showing Stable. Check that all hosts in the management cluster are connected to vCenter and not in maintenance mode. Verify that all VMs in the management cluster are powered on or in a known state (you don’t want to discover a half-failed vCenter migration halfway through a patch).
Check the vSAN capacity. During patching, each host goes into maintenance mode one at a time. Your cluster needs enough headroom to absorb one host’s worth of VMs. If you’re above 70% vSAN utilisation, either clean up some data or defer the patch until you’ve addressed the capacity situation.
Verify that SDDC Manager’s service account credentials for vCenter, NSX, and the ESXi hosts are current. Go to Administration > Credentials in SDDC Manager and look for any credentials showing as expired or failed. If any credentials are stale, update them in SDDC Manager before running the pre-check — otherwise the pre-check will fail on credential validation and you’ll need to fix it and re-run, burning time in your maintenance window.
Step 4: Run the LCM Pre-Check
In SDDC Manager, go to Lifecycle Management > Upgrades. Select the management domain and click the patch version you want to apply. Click Pre-check.
The pre-check runs automatically through a series of validation steps and takes around 10-15 minutes. It checks DNS, NTP, vSAN health, NSX manager status, host connectivity, certificate validity, available disk space on all management appliances, and several other items.
Review every item in the pre-check results. Warnings (yellow) can usually be acknowledged and bypassed — LCM will ask you to confirm you’ve reviewed them before proceeding. Errors (red) must be resolved. You cannot start the patch until all errors are cleared.
Common pre-check errors in my experience: expired certificates on an ESXi host (run Certificate Management in SDDC Manager to renew before retrying), NTP drift on one or more hosts (restart the NTP client on the affected host and confirm sync before retrying), and insufficient disk space on the vCenter appliance (vCenter patches need working space on the appliance itself — if the /storage/log partition is full, clean it up first).
Step 5: Apply the Patch
Once the pre-check passes with no errors, click Apply Patch. LCM will ask you to confirm the patch details and acknowledge any warnings you bypassed during pre-check.
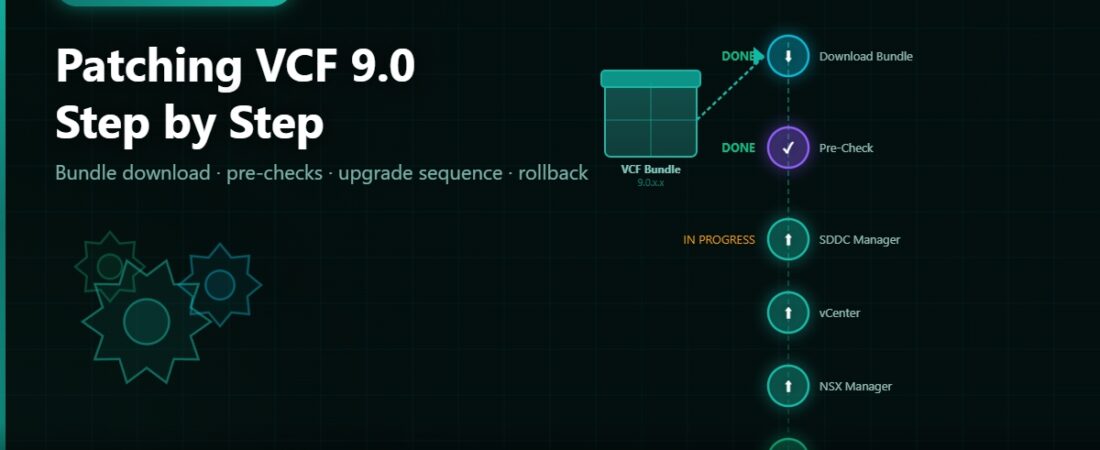
The patch applies in this order: SDDC Manager first, then vCenter, then NSX Manager nodes, then NSX Edge nodes, then NSX transport nodes (ESXi VIB updates), then ESXi itself. This sequence is fixed and cannot be changed.
SDDC Manager patch — 20-30 minutes, appliance restarts, UI temporarily unavailable. Normal behaviour. When the UI returns, confirm the version shown in the footer matches the patched version before LCM moves on.
vCenter patch — 45-90 minutes. vCenter goes through a staged update. All vCenter API access is unavailable during this window. VMs keep running but nothing that calls the vCenter API (backups, monitoring, Aria Operations) will work until vCenter comes back.
NSX Manager nodes — 20-30 minutes per node, sequential. Data plane stays up. Management plane is intermittently unavailable as each node patches.
NSX Edge nodes — Sequential, with HA failover if applicable. Watch the LCM task log for any Edge failover errors. If an Edge node fails to upgrade and NSX reports a routing issue, check the Edge node’s management connectivity and disk space before retrying.
ESXi hosts — One at a time, rolling. Each host enters maintenance mode, gets patched (ESXi patch and NSX VIB update in the same maintenance window), reboots, and rejoins before the next host starts. Plan 15-20 minutes per host. In a 4-host management cluster, this phase takes about 60-80 minutes.
Step 6: Post-Patch Verification
When LCM marks the patch complete, resist the temptation to call it done and close the maintenance window. Run through a verification pass first.
In SDDC Manager under Inventory, check that all components show the patched version numbers. Compare against the BOM from the patch release notes — every component should match exactly.
In vCenter, run the vSAN health check and let it complete fully. After ESXi host reboots, vSAN often starts resync operations as it rebalances any data that moved during maintenance mode. This is normal and resolves on its own, but confirm there are no persistent errors.
In NSX Manager under System > Upgrade, confirm all transport nodes show the patched NSX version. Any host still showing the old version needs investigation — the VIB update may have failed on that host.
Test basic workload functionality: confirm VMs are reachable, check Tier-0 BGP session status, verify that any monitoring tools (Aria Operations, third-party) have reconnected to their data sources after the vCenter downtime window.
If you took a snapshot of SDDC Manager before the patch, delete it now. A stale snapshot on an appliance that’s actively receiving log writes will grow continuously and will eventually cause disk space issues if left indefinitely.
Patch Scheduling: How Often?
VCF patch releases typically come out every three to four months. My recommendation for production environments is to apply each patch within 60-90 days of release, with security-advisory patches (like VCF 9.0.1.0 with its CVE fix) treated as urgent and applied within two weeks if possible.
Running more than one patch level behind puts you in an awkward position if a critical CVE drops and the fix requires you to be on the latest patch first. Staying current also means each individual patch is a smaller change, which means less risk per patch event and more predictable maintenance windows.