
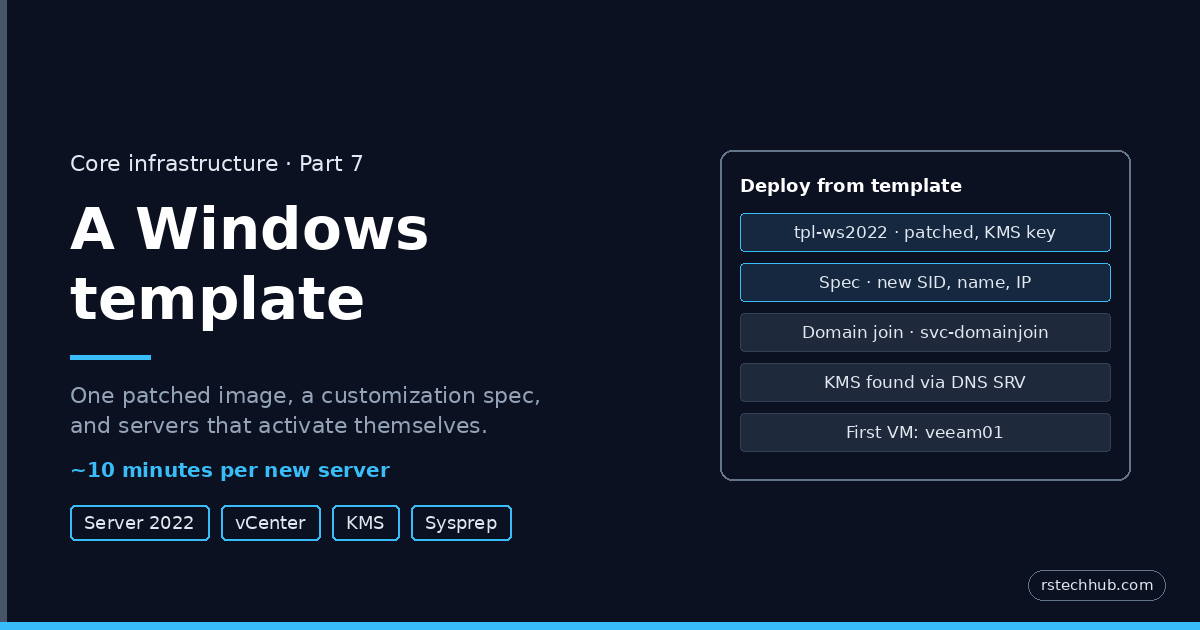
My backup server was about to become yet another Windows VM built by hand from an ISO: install, VMware Tools, updates, the same handful of settings, domain join. With more Windows servers coming for the VCF build, that is a lot of repeated clicking.
Templates and customization specs are nothing new. People have been writing this up for well over a decade, and the core steps have barely changed. I am documenting it anyway because it is part of how this lab is built, and because the parts that tripped me up are the ones older guides skip: KMS clients that cannot find their server because DNS never advertised it, a VMkernel port group that VMs cannot use, and a static address sitting inside a DHCP pool. Treat the basics as a refresher and the gotchas as the reason to read on.
So before building veeam01 I stopped and made a template. One patched Windows Server 2022 image, one vCenter customization spec, and a DNS record so every new server activates itself. A new domain-joined server now takes about ten minutes, most of it waiting.
| Piece | What it does |
|---|---|
| tpl-ws2022 | A patched, generic Windows Server 2022 VM, converted to a template. Never joined to the domain, never sysprepped by hand |
| Customization spec | Runs sysprep on each clone: new SID, computer name from the VM name, static IP, time zone, domain join |
| svc-domainjoin | A dedicated AD account used only to join new VMs |
| KMS SRV record | Lets every clone find the KMS server through DNS and activate on its own |
Script for this post: Set-TemplateBaseline.ps1 applies the template settings from step 2 in one go, and Set-KmsDnsRecord.ps1 creates the KMS SRV record so clones activate on their own. Both free on GitHub.
Update, 2 October 2026: the template had a gap I only found while upgrading Veeam. Its 100 GB disk gave C: just 59 GB. The other 40 GB sat unallocated behind a 713 MB Recovery partition at the end of the disk, so Windows could not extend C: into it, and every VM built from the template inherited the same layout. Veeam 13.1 then refused to upgrade with only 18 GB free. I removed the Recovery partition in the template and extended C: with diskpart (Windows RE was already disabled, so nothing was lost). New VMs now get the full disk.
diskpart
sel disk 0
list part
sel part 4          (the Recovery partition, about 700 MB)
del part override
sel vol c
extend
exit
For VMs already built from the template, the same fix in an elevated PowerShell session (this is what I ran on the Veeam server):
reagentc /info
reagentc /disable
Get-Partition -DiskNumber 0 | Where-Object Type -eq 'Recovery' | Remove-Partition -Confirm:$false
Update-HostStorageCache
Resize-Partition -DriveLetter C -Size (Get-PartitionSupportedSize -DriveLetter C).SizeMax
Get-PSDrive C
Step 1: Build the base VM
| Setting | Value |
|---|---|
| Name | tpl-ws2022 |
| Guest OS | Windows Server 2022 |
| CPU / RAM | 2 vCPU / 4 GB (resized per clone) |
| Disk | 60 GB thin |
| SCSI controller | VMware Paravirtual |
| Network | Management VLAN, VMXNET3 |
| Firmware | EFI with Secure Boot (VM Options → Boot Options, already the default) |
Install Windows Server 2022 Standard (Desktop Experience). Datacenter adds nothing these VMs use. One catch with the Paravirtual controller: setup will not see the disk until you load the driver. Mount the VMware Tools ISO at the disk selection screen and load it from Program Files\VMware\VMware Tools\Drivers\pvscsi. If that is a hassle, pick LSI Logic SAS instead.
Step 2: Settle the image
Install VMware Tools (Guest OS → Install VMware Tools, Typical, reboot). Then the settings every lab server gets, in one PowerShell block:
Set-TimeZone -Id "GMT Standard Time"
Set-ItemProperty 'HKLM:\System\CurrentControlSet\Control\Terminal Server' -Name fDenyTSConnections -Value 0
Set-ItemProperty 'HKLM:\SYSTEM\CurrentControlSet\Control\Terminal Server\WinStations\RDP-Tcp' -Name UserAuthentication -Value 1
Enable-NetFirewallRule -DisplayGroup "Remote Desktop"
Enable-NetFirewallRule -Name FPS-ICMP4-ERQ-In
powercfg /setactive SCHEME_MIN
Get-ScheduledTask -TaskName ServerManager | Disable-ScheduledTask
slmgr /ipk
RDP with Network Level Authentication, ping allowed, High performance power plan, and Server Manager no longer popping up at every logon. The last line swaps in the KMS client key (GVLK) for your edition. Microsoft publishes these on its KMS client activation keys page. More on why in step 7.
Step 3: Patch, clean, stop
Windows Update until there is nothing left (two or three rounds). Then shrink the component store so every clone is smaller:
Dism.exe /Online /Cleanup-Image /StartComponentCleanup /ResetBaseThen shut down. Three things I deliberately did not do:
- No sysprep. vCenter runs sysprep itself when it deploys from the template. Running it yourself as well just gets in the way.
- No domain join. A joined template carries a computer account that every clone would fight over.
- No activation. Sysprep resets it on every clone anyway.
Before converting, set the CD/DVD drive back to Client Device and untick Connected. Otherwise every clone inherits the Windows ISO. Then right-click → Template → Convert to Template.
Step 4: An account just for domain joins
The customization spec stores a password to join the domain. I did not want that to be my admin account, so it gets its own:
New-ADUser -Name svc-domainjoin -SamAccountName svc-domainjoin `
  -Path "OU=Service Accounts,OU=Lab,DC=lab,DC=internal" `
  -AccountPassword (Read-Host -AsSecureString "svc-domainjoin password") `
  -Enabled $true -PasswordNeverExpires $true -CannotChangePassword $true
The spec also offers an OU field. I left it blank. Blank means new computers land in the default Computers container, where any domain user can join a machine. Fill in an OU and the account first needs delegated rights to create computer objects there, or the join fails at deploy time with nothing obvious on screen. Moving the odd computer object afterwards is easier than debugging that.
Step 5: The customization spec
Policies and Profiles → VM Customization Specifications → New:
| Page | Setting |
|---|---|
| Name and target OS | Name WindowsServers2022Lab, Windows, Generate a new security identity (SID) |
| Computer name | Use the virtual machine name |
| Windows license | The same KMS client key, server license mode Per seat |
| Administrator password | The template’s local admin password (from the password vault) |
| Time zone | (GMT) Dublin, Edinburgh, Lisbon, London |
| Network | Custom: NIC1 prompts for the IPv4 address at deploy time. Mask, gateway, DNS servers and DNS suffix fixed in the spec |
| Workgroup or domain | lab.internal, joined as svc-domainjoin |
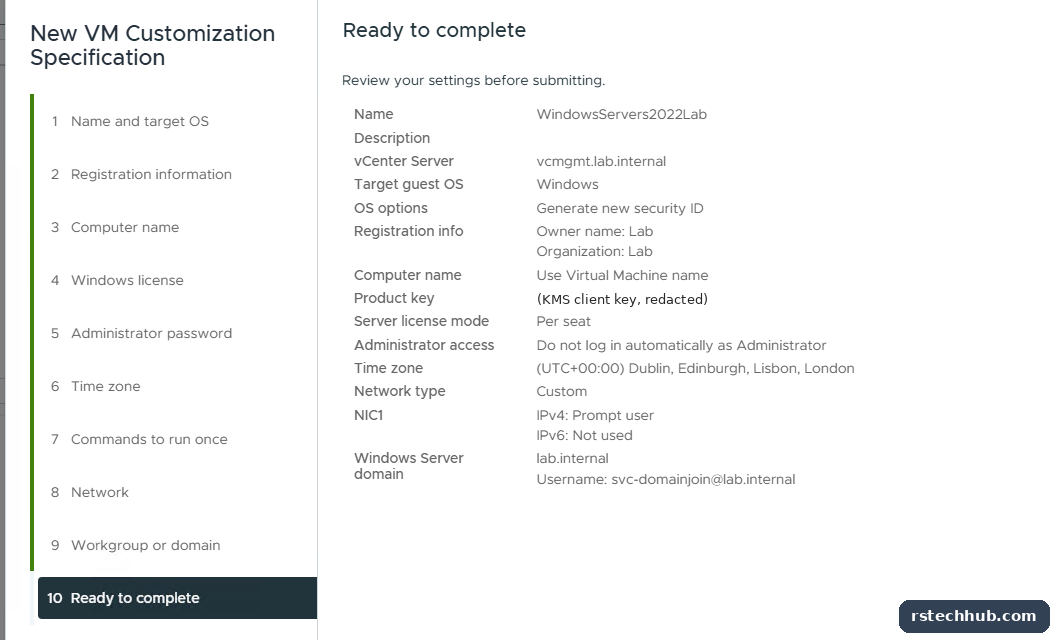
Prompting for the IP is the trick that makes one spec reusable. Everything that is the same for every server lives in the spec; the one thing that differs gets asked for each time.
Step 6: Deploy the first server
Right-click the template → New VM from This Template. Name veeam01, tick Customize the operating system (pick WindowsServers2022Lab) and Customize this virtual machine’s hardware. Enter the IP when asked, resize to 4 vCPU / 8 GB / 100 GB, power on. Sysprep runs, the VM reboots twice and comes up joined to the domain.
One snag: veeam01 needs a second NIC on the storage VLAN, and the Storage-NFS port group I made for the host’s NFS vmk was not in the list. On a standard switch, a port group created for a VMkernel adapter is a VMkernel port group, and VMs cannot connect to it. VMs need their own VM port group on the same VLAN: Add Networking → Virtual Machine Port Group for a Standard Switch → vSwitch0 → VM-Storage-48, VLAN 48. I deployed without the second NIC and added it afterwards.
Step 7: Activation, and the missing DNS record
Everything checked out on veeam01 except activation:
slmgr /dli
Description: Windows(R) Operating System, VOLUME_KMSCLIENT channel
License Status: Notification
Notification Reason: 0xC004F056.
The key was right (VOLUME_KMSCLIENT channel). 0xC004F056 means it could not find or reach a KMS host. A KMS client finds its server through a DNS SRV record, and my lab.internal zone had never had one:
Resolve-DnsName -Type SRV _vlmcs._tcp.lab.internal
Resolve-DnsName : _vlmcs._tcp.lab.internal : DNS name does not exist
First, prove the KMS server is reachable on its port, then give it a name and advertise it:
Test-NetConnection 192.168.10.250 -Port 1688
TcpTestSucceeded : True

Add-DnsServerResourceRecordA -ZoneName lab.internal -Name kms01 -IPv4Address 192.168.10.250 -CreatePtr
Add-DnsServerResourceRecord -ZoneName lab.internal -Srv -Name "_vlmcs._tcp" -DomainName "kms01.lab.internal" -Priority 0 -Weight 0 -Port 1688

slmgr /ato
Product activated successfully.
That one record is what makes the template fully hands-off. Every clone boots with the KMS client key, looks up _vlmcs._tcp, finds kms01 and activates. No keys in anyone’s hands, and it renews itself every seven days.
A side quest: the KMS server was inside the DHCP pool
While adding the record I noticed the KMS server’s address sat inside the router’s DHCP pool, and so did my old management server next to it. Both had their IPs set by hand, so there was no lease to make static. The router could have handed either address to a new device one day. On the MikroTik the fix was to cut them out of the pool:
/ip pool set [find name="dhcp_pool1"] ranges=192.168.10.240-192.168.10.249,192.168.10.252-192.168.10.254Worth a look in your own lab: anything configured with a static IP should live outside every DHCP range.
Checking a new server
Five lines on each new VM tell you the template and spec did their job:
hostname
(Get-CimInstance Win32_ComputerSystem).Domain
Get-NetIPAddress -AddressFamily IPv4 | Where-Object IPAddress -notlike "169.*" | Select-Object InterfaceAlias, IPAddress
Get-TimeZone | Select-Object Id
cscript //nologo C:\Windows\System32\slmgr.vbs /dli
What I would do differently
- Build the template before the first Windows server, not after several.
- Check
_vlmcs._tcpexists before deploying anything that relies on KMS. - Create the VM port groups for each VLAN at the same time as the VMkernel ones.
- Keep the template patched: convert it back to a VM once a month, update, clean, convert again.
Next
veeam01 is up, joined and activated. Next it gets its storage NIC and Veeam Backup & Replication 12.3, backing up the core VMs to the TrueNAS share.