
The lab core is built: two domain controllers, a CA, a management vCenter, Gitea, a password vault. None of it is backed up as whole VMs yet. vCenter backs up its own configuration every night, but if the DL380 dies I would be rebuilding every one of those VMs from scratch. This series fixes that with Veeam Backup & Replication.
Where the backups go
The obvious answer was the DL380 itself. It has plenty of local disk. It is also the host running every VM I want to protect, so one dead RAID controller would take out the VMs and their backups together. Backups must live on a different box from what they protect.
| Copy | Where | Network |
|---|---|---|
| 1. Live VMs | DL380 management host | — |
| 2. Nightly backups | Synology DS3617xs, NFS share | Management VLAN, 10GbE |
| 3. Immutable copy | Hardened Linux repository (Part 2) | — |
Three copies on three physical boxes. I also have an older NAS on the 1GbE out-of-band network, but backup traffic does not belong on the network I use to rescue servers, so it stays out of this.
Windows or the Veeam Software Appliance?
Veeam 13 ships a hardened Linux appliance as well as the Windows installer. I wanted to run version 12 first and then write up the upgrade to 13, and that decided it:
- The appliance starts at version 13. There is no 12 to upgrade from.
- Moving a Windows install to the appliance is a configuration migration, supported from 13.0.x only and one-way (Veeam KB4800).
- Windows upgrades in place from 12.3.1 or later (Veeam KB4763), joins the domain, and uses the same admin tools as the rest of the lab.
Why start on an older version?
At the time of writing the current release is 13.1.1, so 12.3 is already a version behind. I am installing it on purpose. Plenty of production environments still run 12.x, and the step every one of them has to take next is the move to 13. Building on 12.3 first means this series covers both: a clean 12.3 install that matches what many people run today, and a real in-place upgrade to 13 with whatever it throws up. If you are starting fresh with no reason to stay on 12, go straight to the latest release; the design and networking parts of this post apply either way.
Community Edition is free for up to 10 workloads, which covers the core VMs comfortably.
Step 1: Deploy veeam01 from the template
This is the first server built from the Windows template in Core Infrastructure Part 7: 4 vCPU, 8 GB RAM, 100 GB disk, IP entered at deploy time, joined and KMS-activated without touching it.
Step 2: A second NIC on the storage VLAN
The original plan had Veeam writing to TrueNAS over NFS on the storage VLAN. If veeam01 only had a management NIC, every backup would be routed through the core switch between VLANs, the same bottleneck I avoided for the ESXi datastore. So it got a second NIC directly on the storage VLAN, with no gateway. In the end the nightly backups went to the Synology instead (Step 5), but I kept the TrueNAS repository and this NIC for now.
The port group that was not in the list
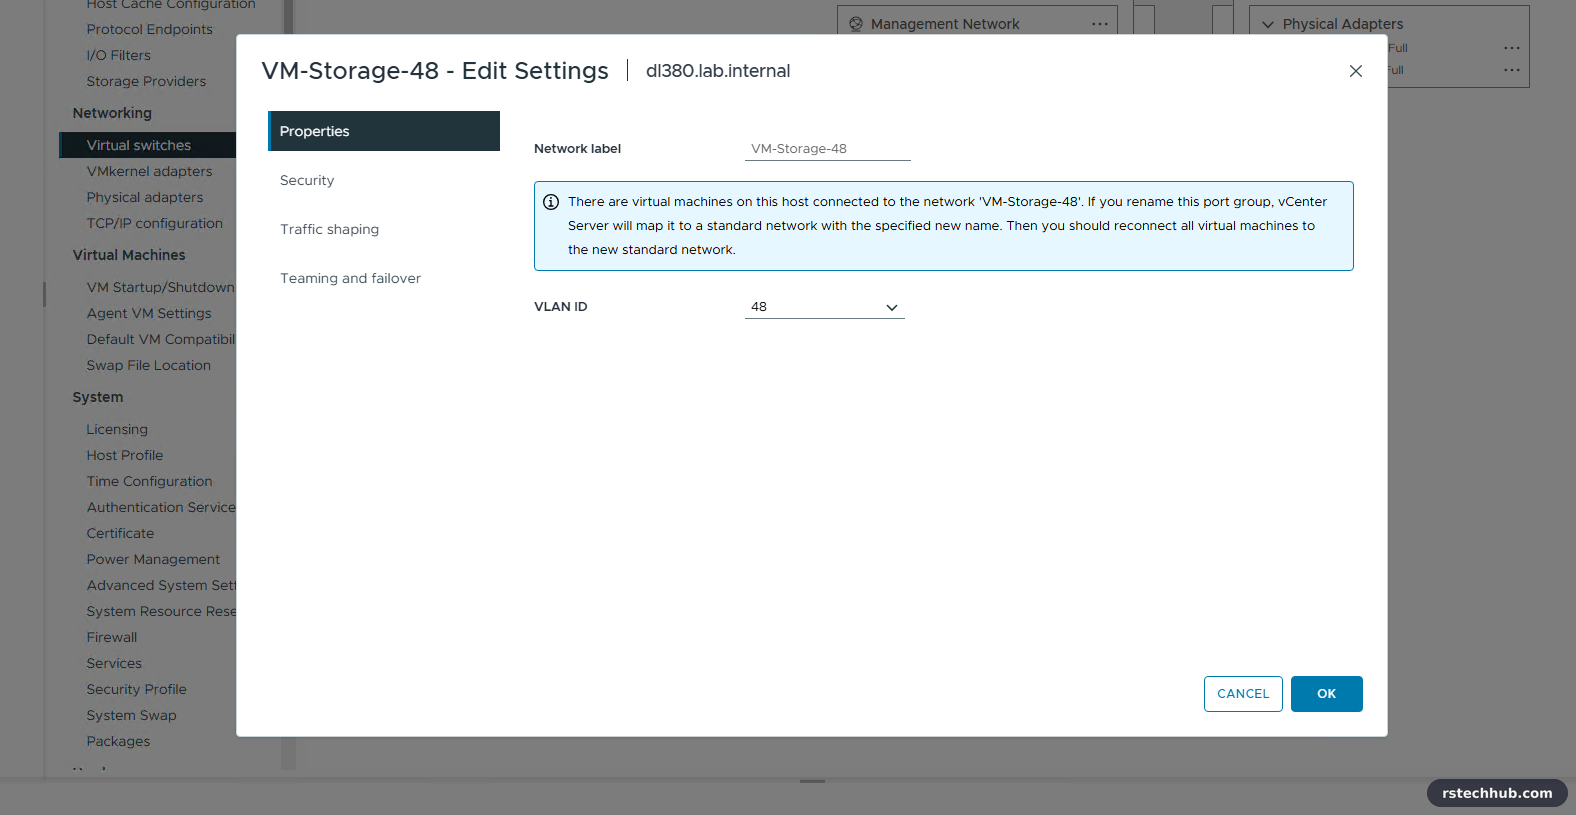
The host already had a Storage-NFS port group on VLAN 48 for its NFS VMkernel adapter. It did not appear when adding a NIC to the VM. On a standard vSwitch, a port group created for a VMkernel adapter can only hold VMkernel adapters. VMs need a Virtual Machine Port Group, even on the same VLAN:
Host → Configure → Networking → Virtual switches → vSwitch0 → Add Networking → Virtual Machine Port Group for a Standard Switch → label VM-Storage-48, VLAN ID 48.
A management address on the storage NIC
The new NIC came up with a DHCP address from the management VLAN, even though the port group and the VM both checked out as VLAN 48. There is no DHCP on the storage VLAN, so it should have got nothing. I did not get to the bottom of where that lease came from; the fix was to switch DHCP off on that NIC and set the address by hand:
$nic = "Ethernet1"
Set-NetIPInterface -InterfaceAlias $nic -Dhcp Disabled
Get-NetIPAddress -InterfaceAlias $nic -AddressFamily IPv4 -ErrorAction SilentlyContinue | Remove-NetIPAddress -Confirm:$false
New-NetIPAddress -InterfaceAlias $nic -IPAddress 192.168.48.20 -PrefixLength 24
Set-DnsClient -InterfaceAlias $nic -RegisterThisConnectionsAddress $false
No gateway, and DNS registration off, so veeam01.lab.internal keeps resolving to its management address only.

Jumbo frames: the setting has a different name
Every guide says -DisplayName "Jumbo Packet" -DisplayValue "Jumbo 9000". On this vmxnet3 driver it failed with One or more parameter values passed to the method were invalid, and a jumbo ping could not even leave the VM:
ping -f -l 8972 192.168.48.100
Packet needs to be fragmented but DF set.
Setting it by the standard registry keyword works on any driver, whatever the display text:
Set-NetAdapterAdvancedProperty -Name Ethernet1 -RegistryKeyword "*JumboPacket" -RegistryValue 9014
ping -f -l 8972 192.168.48.100
Reply from 192.168.48.100: bytes=8972 time<1ms TTL=64
9014 is the 9000-byte MTU plus the Ethernet header. -f forbids fragmentation, so replies prove both the direct path and jumbo frames end to end.
Step 3: Install Veeam Backup & Replication 12.3
Attach the ISO to veeam01, run Setup.exe, Install. Leave the license step empty to get Community Edition. The defaults are right for a lab:
| Setting | Default | Why keep it |
|---|---|---|
| Database | Local PostgreSQL 15 | Free, no 10 GB SQL Express cap, and the engine v13 is built around. A separate SQL server would be one more VM that must be up before backups can run |
| Service account | LOCAL SYSTEM | Veeam talks to vCenter and repositories with credentials you store in Veeam, not with the service account |
| Paths | C:\\ (100 GB disk) | Backups never land on veeam01 itself |
| Check for updates | Automatically | It only notifies. It will not jump you to 13 on its own |
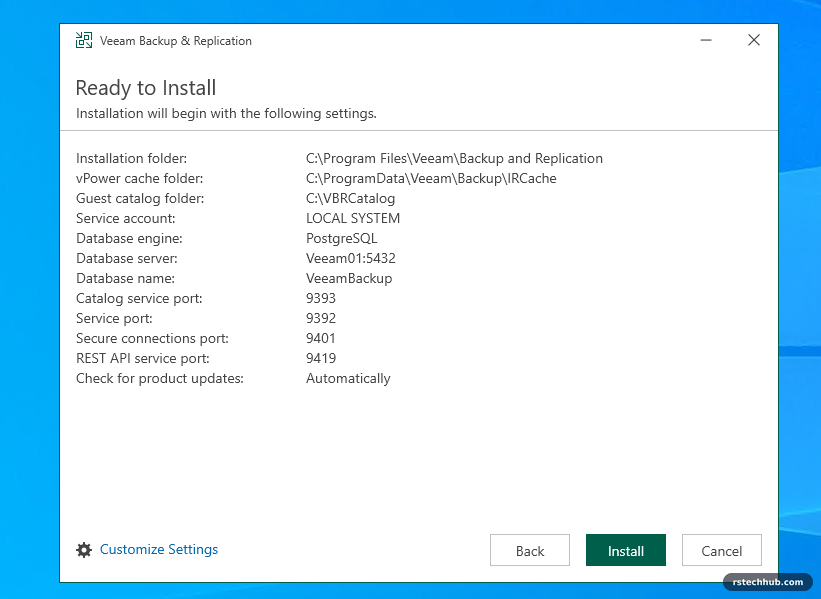
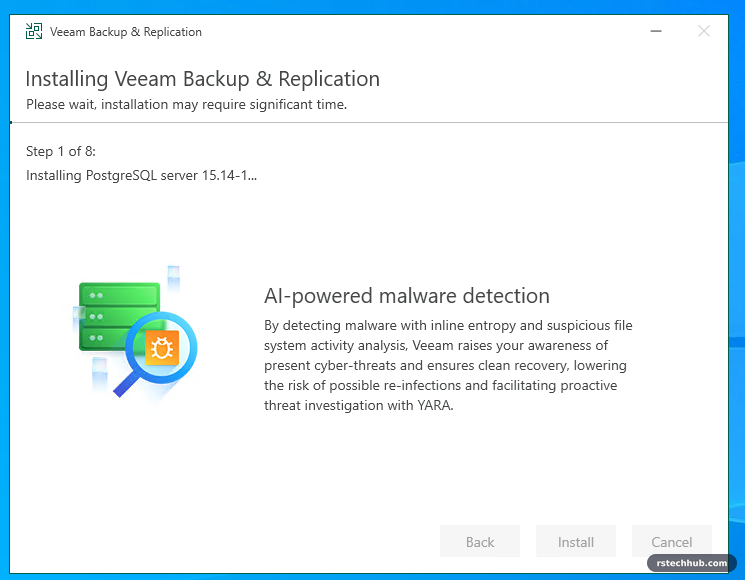
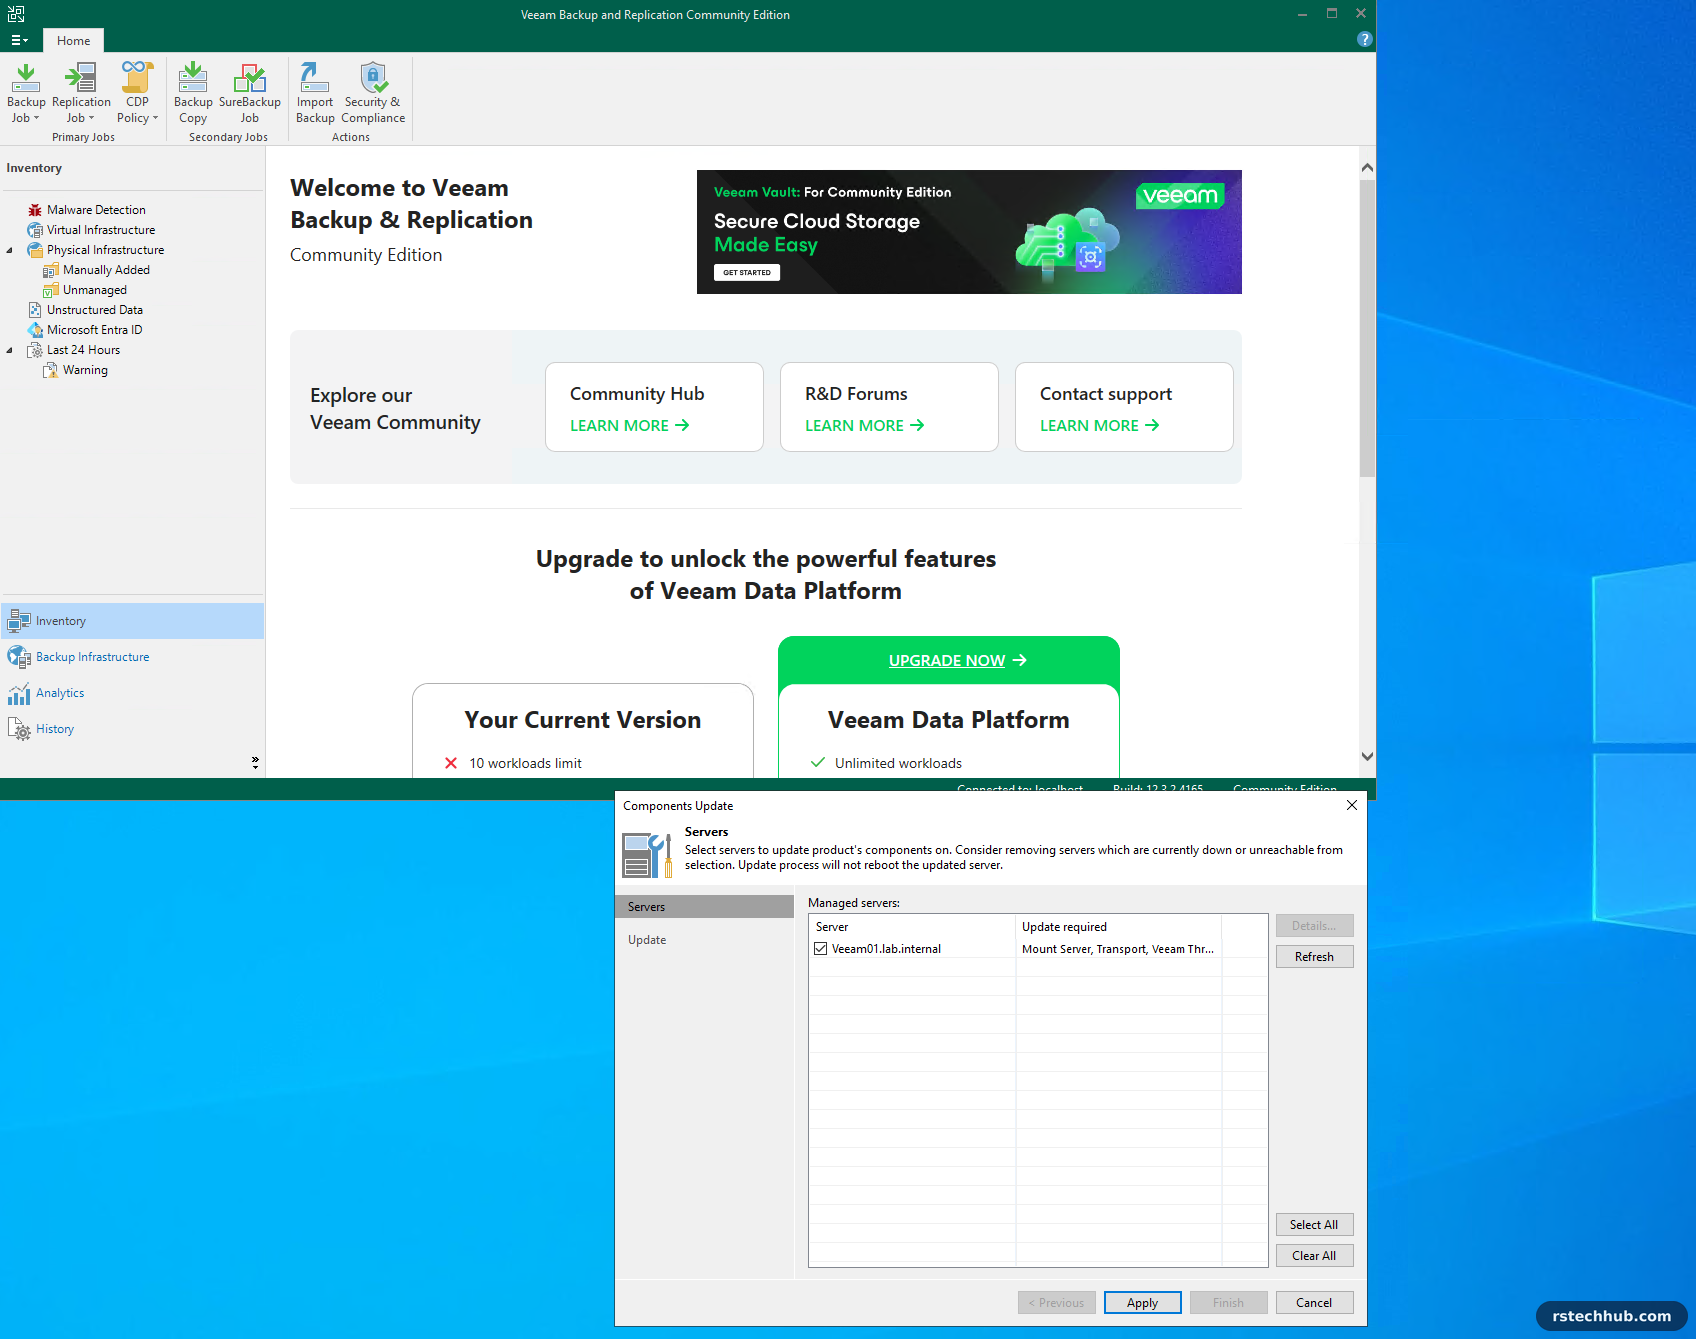
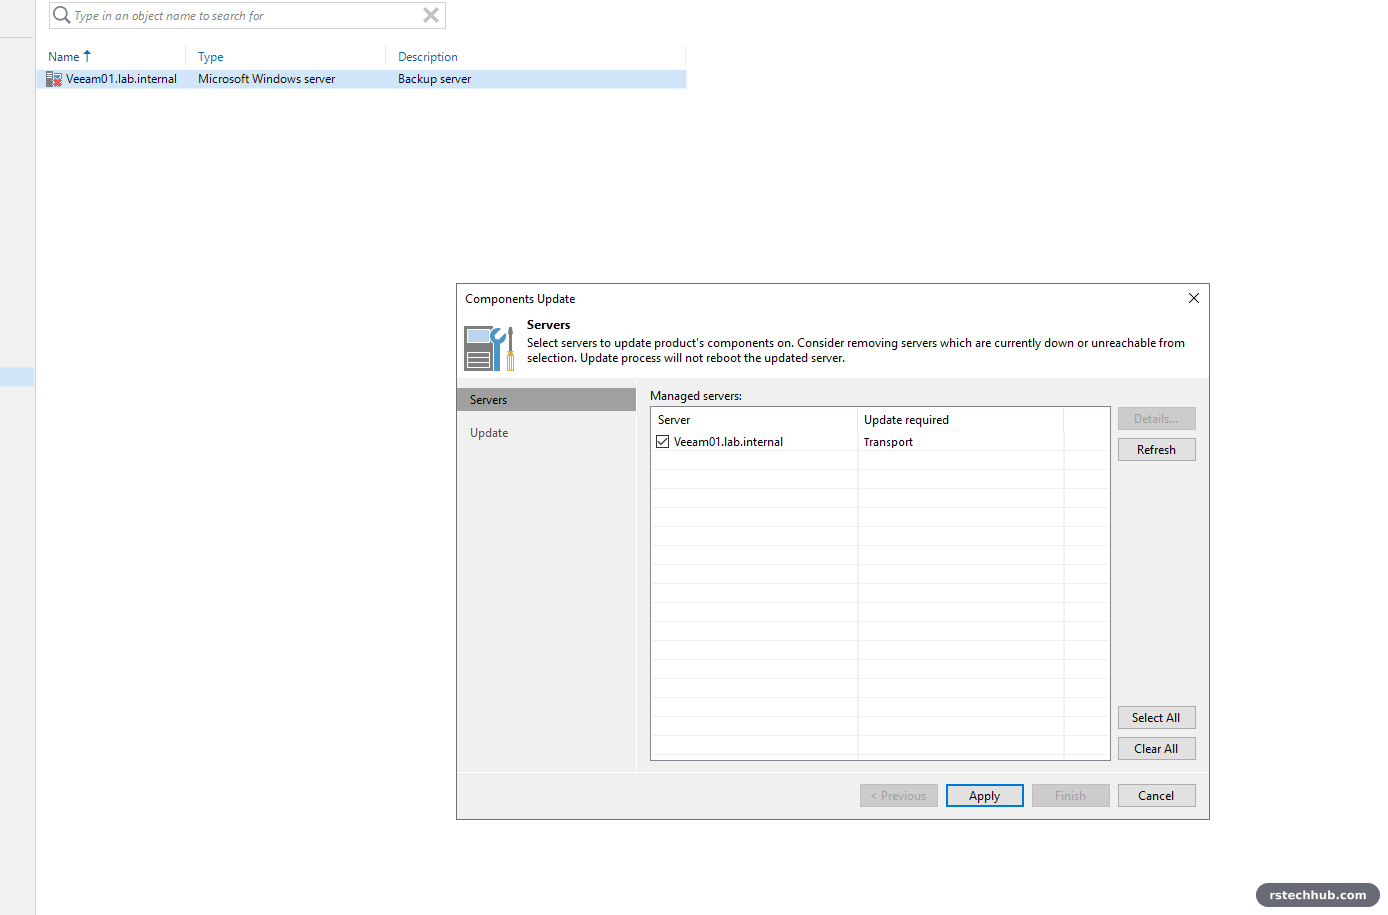
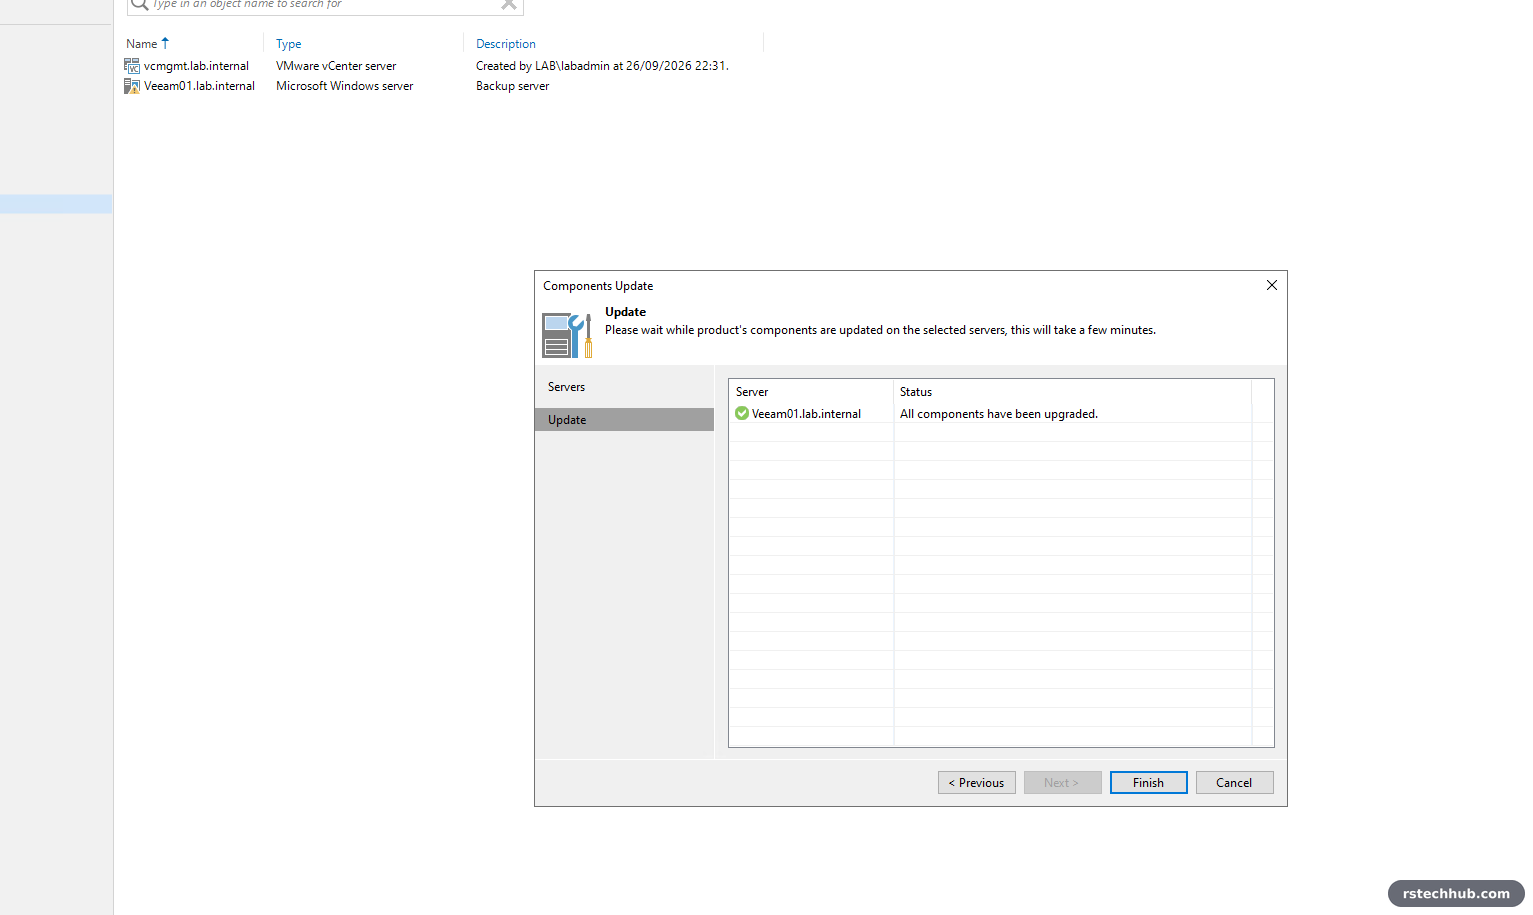
Install takes about 20 minutes. On first launch the console offers a Components Update for the server itself. That is not a version upgrade: it brings the local mount server and transport components in line with the build you just installed. Apply it. My console reported build 12.3.2.4165, comfortably above the 12.3.1.1139 minimum for the later in-place upgrade to 13.
Step 4: Do not run Veeam as the domain Administrator
My first login to the console was as LAB\Administrator, because that is what I was logged into veeam01 with. It works, and it is exactly what you should not do. The backup server holds the keys to every VM you own, including the domain controllers. If an attacker gets domain admin, the first thing they go for is the backups. So the built-in Administrator goes back in the drawer for break-glass use, and Veeam gets its own access path:
| Piece | Purpose |
|---|---|
veeam-admins (AD group) | Who may administer Veeam. Access is granted to the group, never to individual accounts |
labadmin (AD user) | A named admin account for day-to-day work, generic so no personal name ends up in logs or screenshots |
| Local Administrators on veeam01 | The group gets admin rights on the backup server only, not on the whole domain |
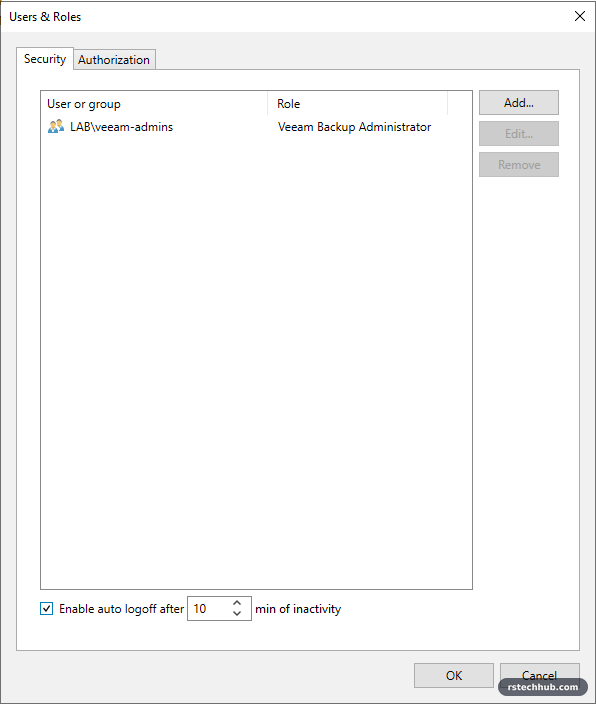
| Veeam Users and Roles | The group becomes Veeam Backup Administrator; the default BUILTIN\Administrators entry is removed |
The whole setup below is also one re-runnable script, New-VeeamAdminAccess.ps1: it skips anything that already exists and prompts for the password.
On a domain controller:
New-ADGroup -Name veeam-admins -GroupScope Global -GroupCategory Security -Path "OU=Groups,OU=Lab,DC=lab,DC=internal"
New-ADUser -Name labadmin -SamAccountName labadmin -Path "OU=Lab,DC=lab,DC=internal" `
  -AccountPassword (Read-Host -AsSecureString "labadmin password") -Enabled $true
Add-ADGroupMember veeam-admins -Members labadmin
On veeam01:
Add-LocalGroupMember -SID "S-1-5-32-544" -Member "LAB\veeam-admins"
Get-LocalGroupMember -SID "S-1-5-32-544"
I first ran that line in the wrong window, on a domain controller, and got Group Administrators was not found. DCs have no local groups at all. Using the well-known SID S-1-5-32-544 instead of the name also makes it work on non-English Windows.
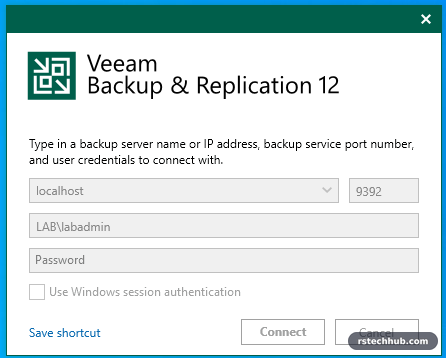
Then in the console: ☰ → Users and Roles → Add LAB\veeam-admins as Veeam Backup Administrator, and remove BUILTIN\Administrators. Log off, log back in as labadmin, and the domain Administrator account is no longer involved in backups at all.
Before removing Administrators, close the console and log back in as the named account, with Windows session authentication unticked. I was logged in to Windows as Administrator at the time, so removing the entry first would have locked me out of my own console. Once the named account works, remove it. While you are in there, tick Enable auto logoff: an open console on the backup server is otherwise an open door for anyone who reaches that desktop.
This is the minimum, not the end state. Veeam’s own hardening guidance goes further: a backup server outside the production domain (or in a separate management forest), MFA on the console, and the four-eyes authorization that v12 added. For a lab, a dedicated group plus immutable copies (coming up) is a sensible line to draw.
Step 5: An NFS share for Veeam on the Synology
I changed my mind about the target here. The nightly backups go to the DS3617xs, which sits on the same 10GbE management VLAN as veeam01, so the path has no routing in it. Everything in this step is in DSM.
Turn on NFS 4.1
In Control Panel → File Services → NFS, tick Enable NFS service and set Maximum NFS protocol to NFSv4.1. Then open Advanced Settings.
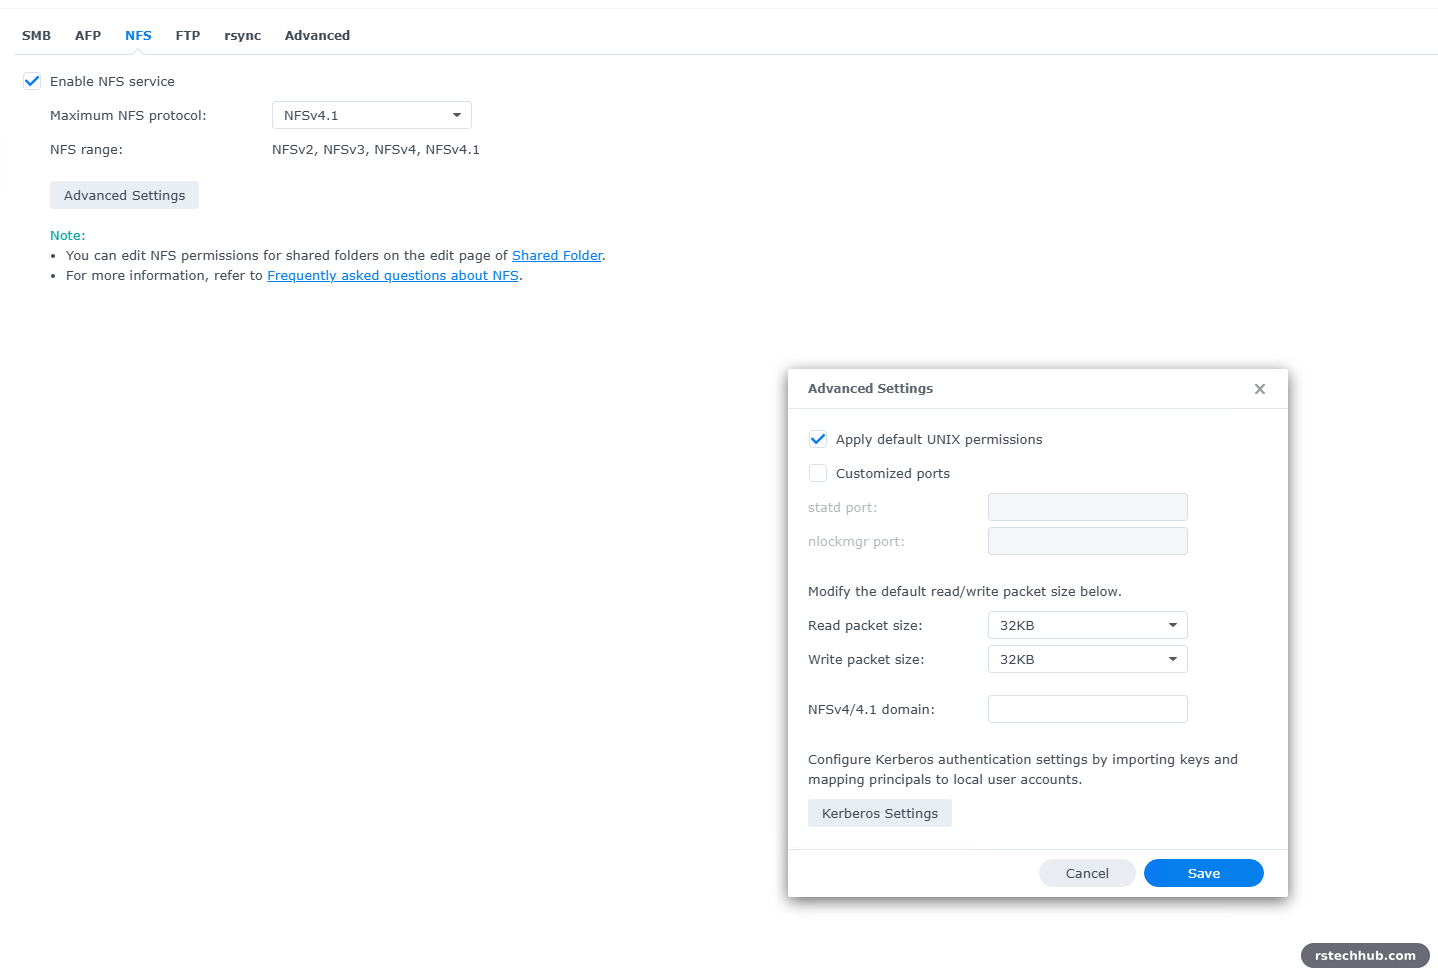
Note on packet size: DSM defaults the NFS read and write packet size to 8KB. Fine for small files. Veeam writes large blocks, though, and at 8KB each write is split into lots of small requests. Set both to the largest value DSM offers. On DSM 7.3 that is 32KB, not the 64KB you will see in some guides, so do not go looking for a higher option. Veeam’s NFS client on the gateway server works with whatever the NAS allows, so nothing changes on the Veeam side.
Create the shared folder
Control Panel → Shared Folder → Create. I called it Veeam and left the Recycle Bin off: Veeam deletes old restore points itself, and a recycle bin would quietly keep them and eat the space.
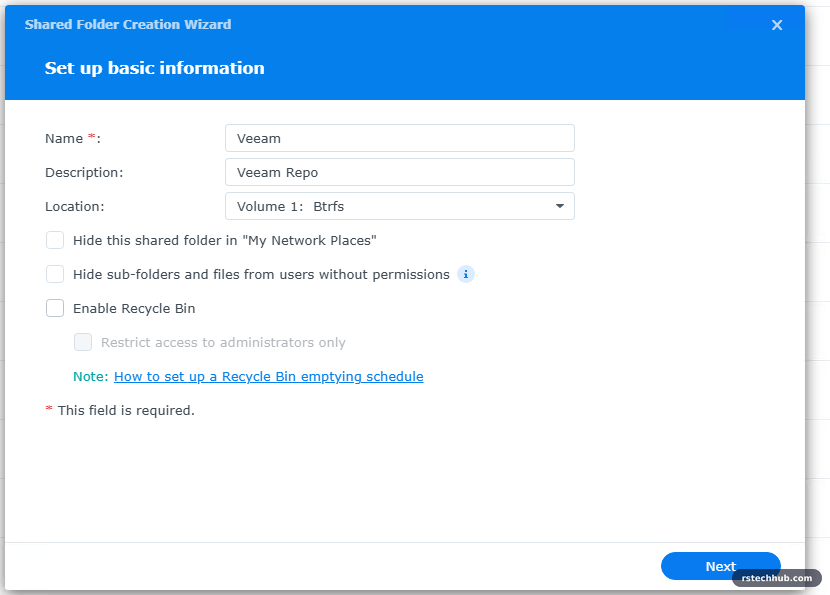
I had assumed this volume was ext4. The wizard showed Btrfs, which opens up DSM immutable snapshots for the backup copy in Part 2.
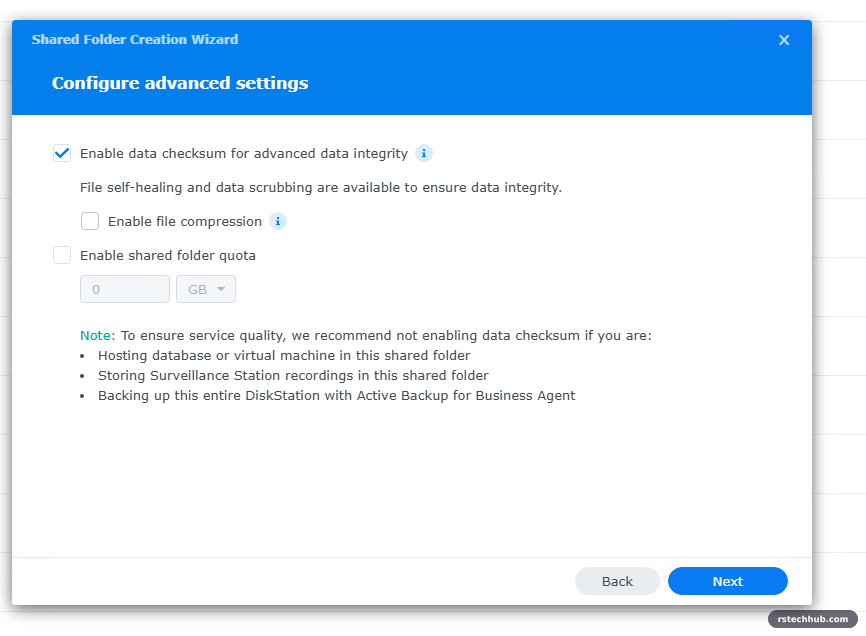
On the advanced settings page I turned data checksum on. Synology warns against it for databases and VMs, but that warning is about constant small random writes. Backup files are big sequential writes, and with checksums on, a scrub can find and repair silent corruption in them. File compression stays off because Veeam already compresses.
On the permissions page I set No Access for my everyday DSM accounts. Veeam reaches the folder over NFS, which ignores these permissions, so nothing breaks. What it does stop is ransomware on one of my own logins browsing the backups over SMB.
Cap it at 4 TB
Veeam cannot limit the size of an NFS repository, so the limit goes on the NAS. Edit → Advanced → Enable shared folder quota, 4 TB. Veeam then reports 4 TB of capacity instead of the whole volume, and if a job ever runs away it fills the quota, not the Synology.
The NFS permission
Edit → NFS Permissions → Create. This rule is the list of machines allowed to mount the share, so it names the client, not the NAS.
| Setting | Value | Why |
|---|---|---|
| Hostname or IP | veeam01’s address on the same VLAN as the NAS | Only the backup server may mount it |
| Privilege | Read/Write | |
| Squash | No mapping | Veeam writes as root; squashing breaks it |
| Security | sys | |
| Enable asynchronous | On only if the NAS is on a UPS | Faster, but a power cut can lose the last writes |
| Allow non-privileged ports | On | Veeam’s NFS client uses ports above 1024 |
| Mounted subfolders | Off |
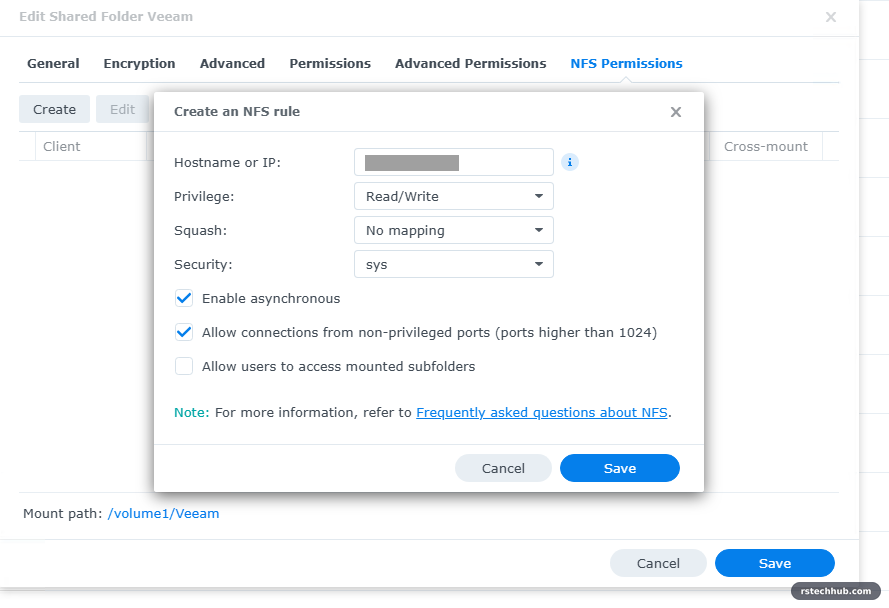
My first rule had the wrong address in it. I typed the NAS’s own IP instead of veeam01’s, which is an easy mistake when both are on the same VLAN and you are thinking “the NFS server”.
Step 6: Add the repository in Veeam
In the console: Backup Infrastructure → Backup Repositories → Add Backup Repository → Network attached storage → NFS share. Give it a proper name on the first page. I skipped it, and Veeam named the repository after the NAS IP, which then shows up in every job. Renaming it later is Properties → Name.
The shared folder is <nas-ip>:/volume1/Veeam. Colon, forward slash, no trailing slash, capital V. A backslash or a space gets you “invalid NFS path” before it even tries to connect.
Failed to connect to the NFS shared folder
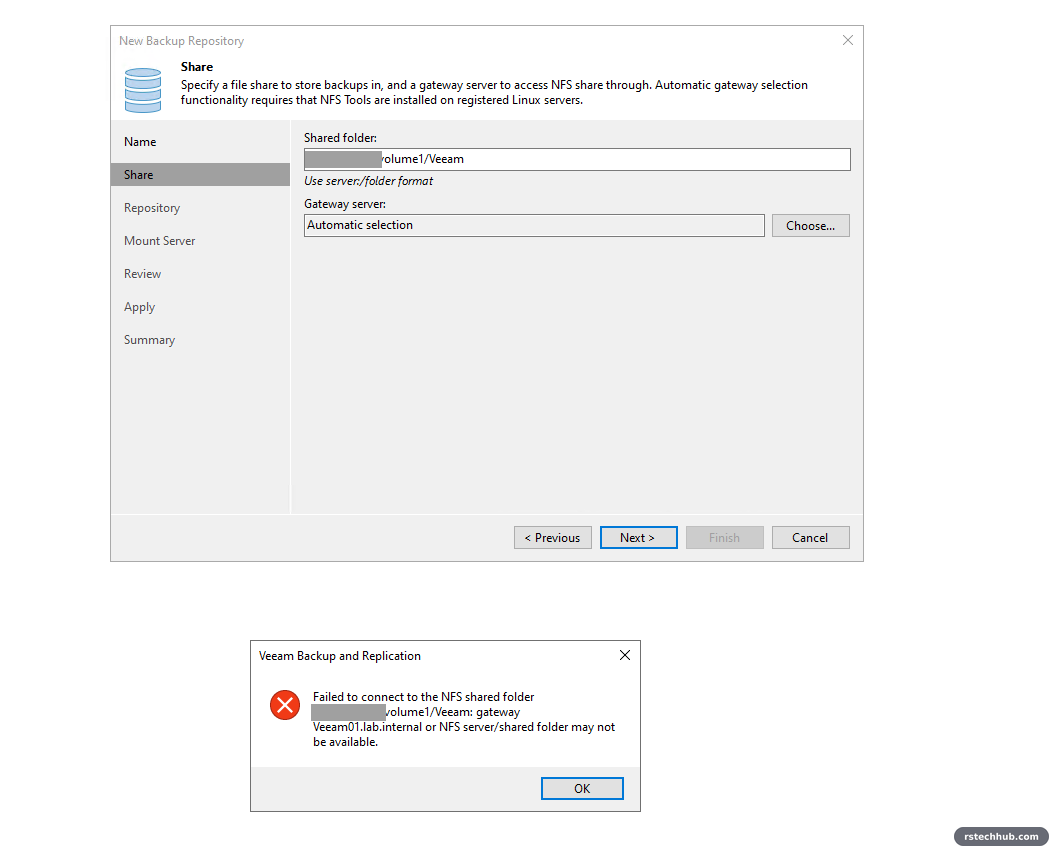
The error is the same whether the NAS refused you or could not be reached, so check in this order:
- The NFS rule names the backup server’s address, not the NAS’s.
- NFS and portmapper answer from the backup server (commands below). If either fails, look at the DSM firewall.
- The path matches the DSM mount path exactly, including case.
Test-NetConnection <nas-ip> -Port 2049   # NFS
Test-NetConnection <nas-ip> -Port 111    # portmapper
Once it connects, the Repository page shows the capacity. With the quota in place it reads 4 TB.
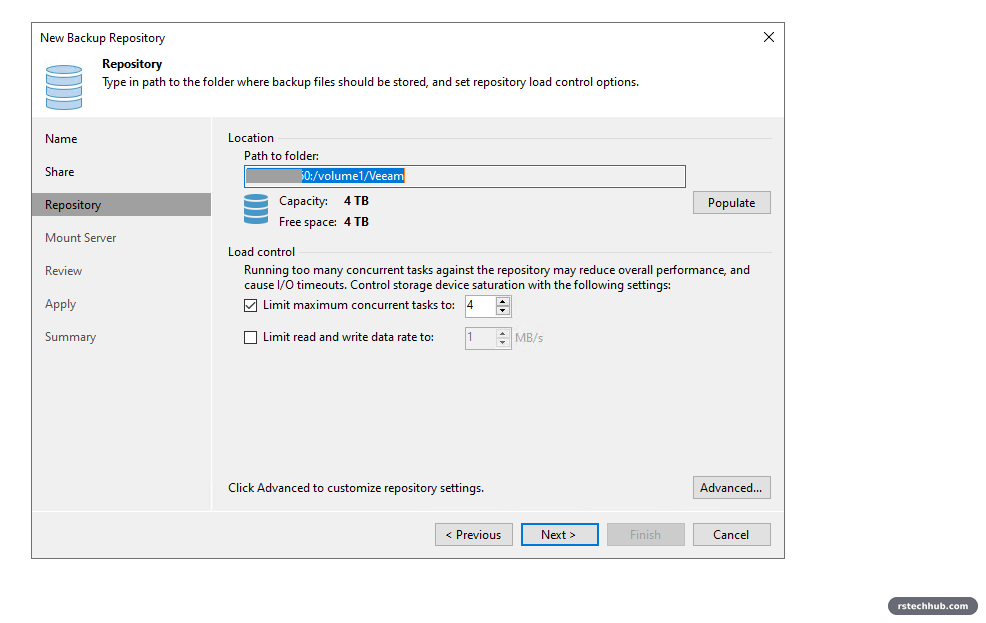
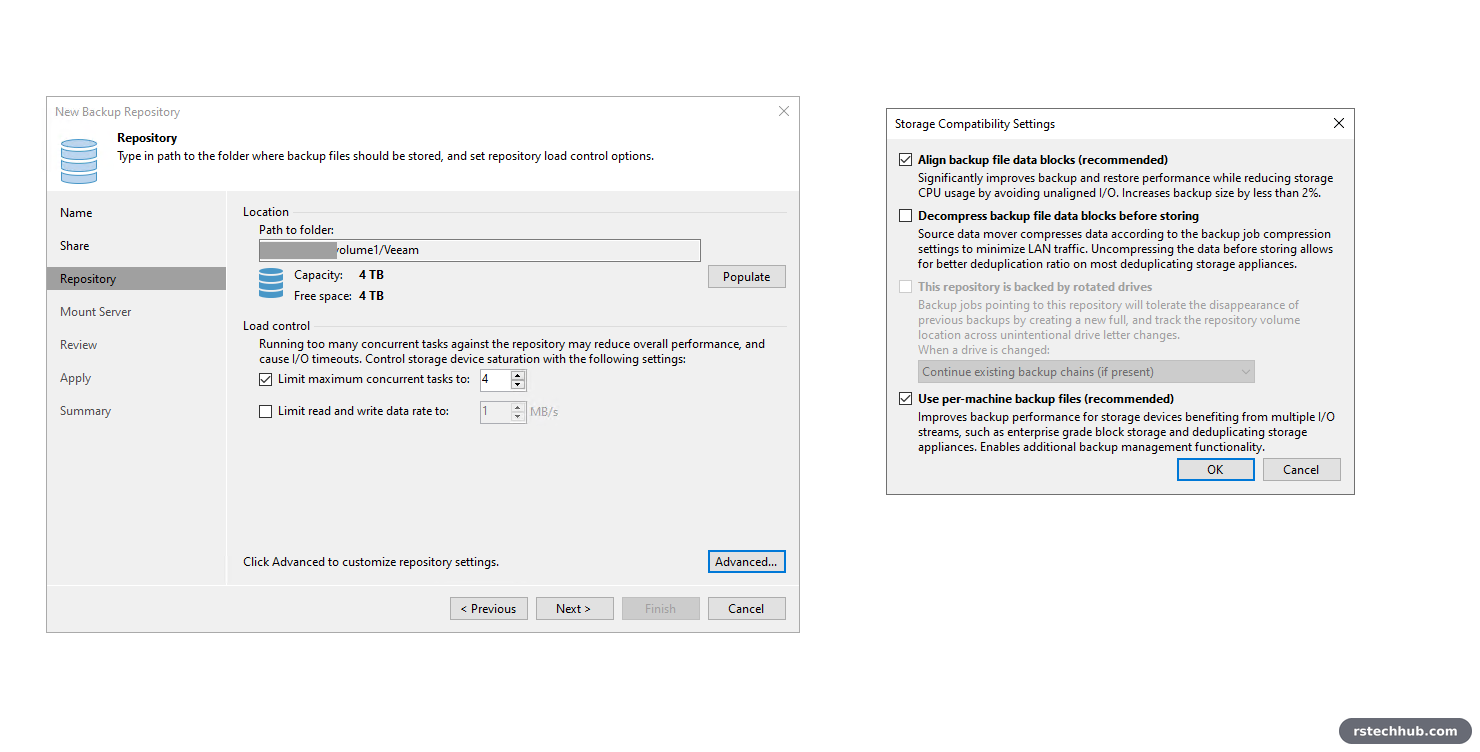
Under Advanced, the defaults are right for a plain NAS: align backup file data blocks on (under 2% extra space for better performance), decompress off because the Synology does not deduplicate, and per-machine backup files on.
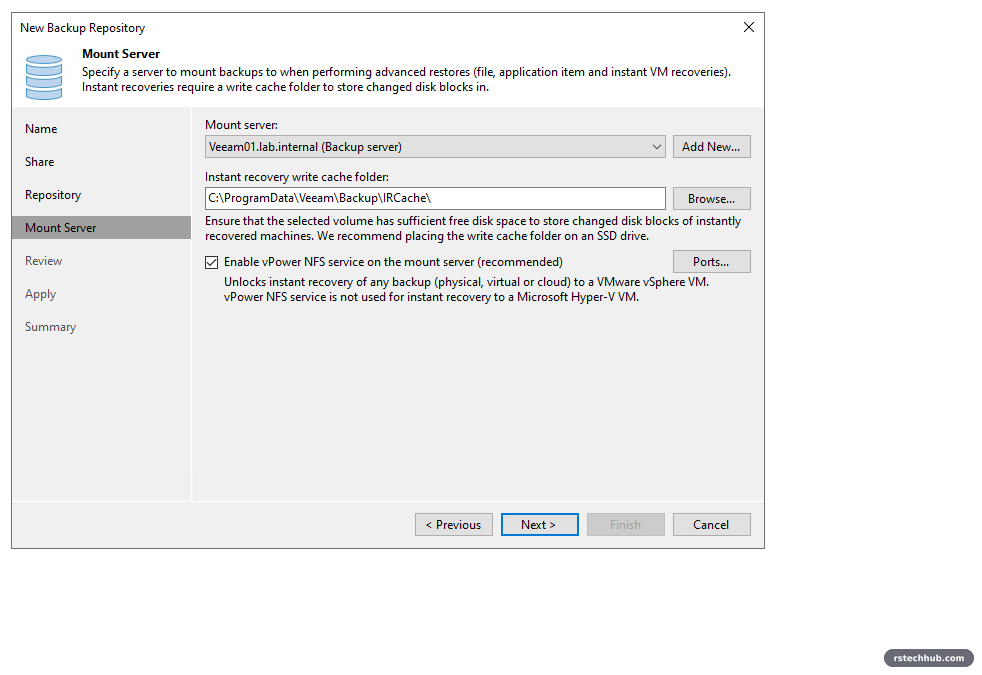
The mount server is veeam01 itself, with the vPower NFS service on. That is what Instant Recovery uses to run a VM straight from the backup. The write cache on C: is fine for a lab.
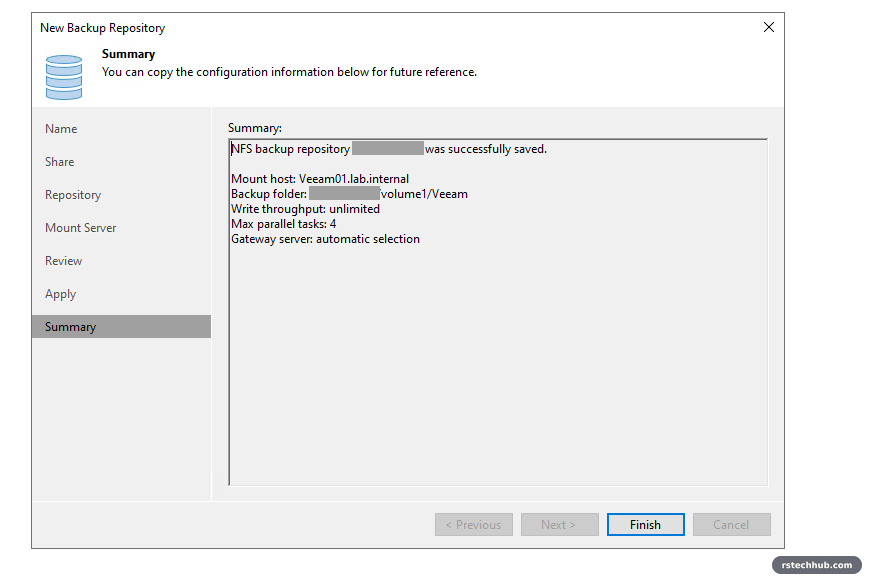
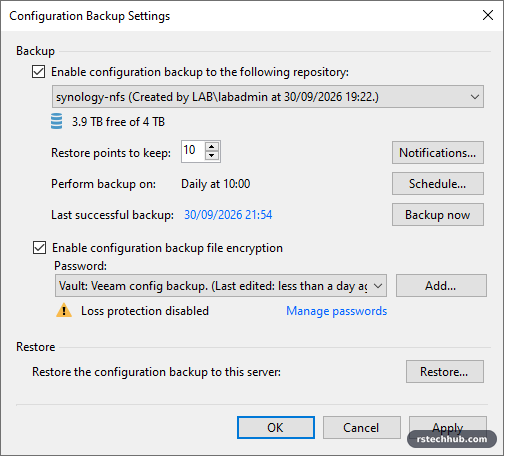
At the end Veeam asks whether to move the configuration backup to the new repository. Say yes. Otherwise it stays on veeam01’s own C: drive, which is the one place it is useless if veeam01 dies.
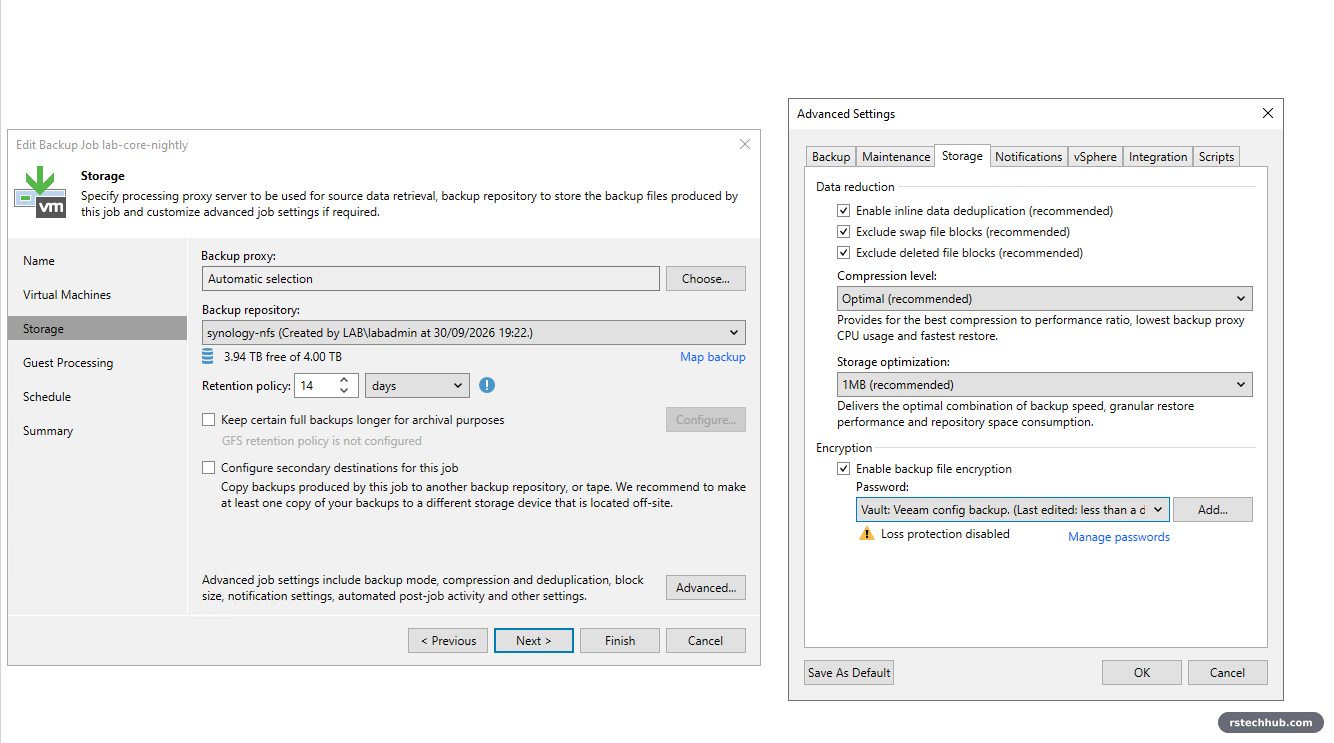
Then open ☰ → Configuration Backup and turn on encryption. Without it, the configuration backup leaves out every saved credential and certificate, so a rebuilt veeam01 would come back without the vCenter account and every other password it knows. Store the encryption password in your password manager straight away. On Community Edition, loss protection needs an Enterprise licence, so a forgotten password means the backup cannot be restored at all.
Step 7: Connect Veeam to vCenter
Veeam talks to vCenter with its own account, svc-veeam, not administrator@vsphere.local. In the vSphere Client, select the vCenter object at the top of the tree, Permissions → Add, pick the account, and give it a role with Propagate to children ticked.
I used the built-in Administrator role. Veeam publishes a least-privilege list of the vCenter permissions it needs, and in production I would build a custom role from it. In a lab that changes every week, a missing permission breaks a backup silently, so I took the simple option and kept the account dedicated and its password in the vault.
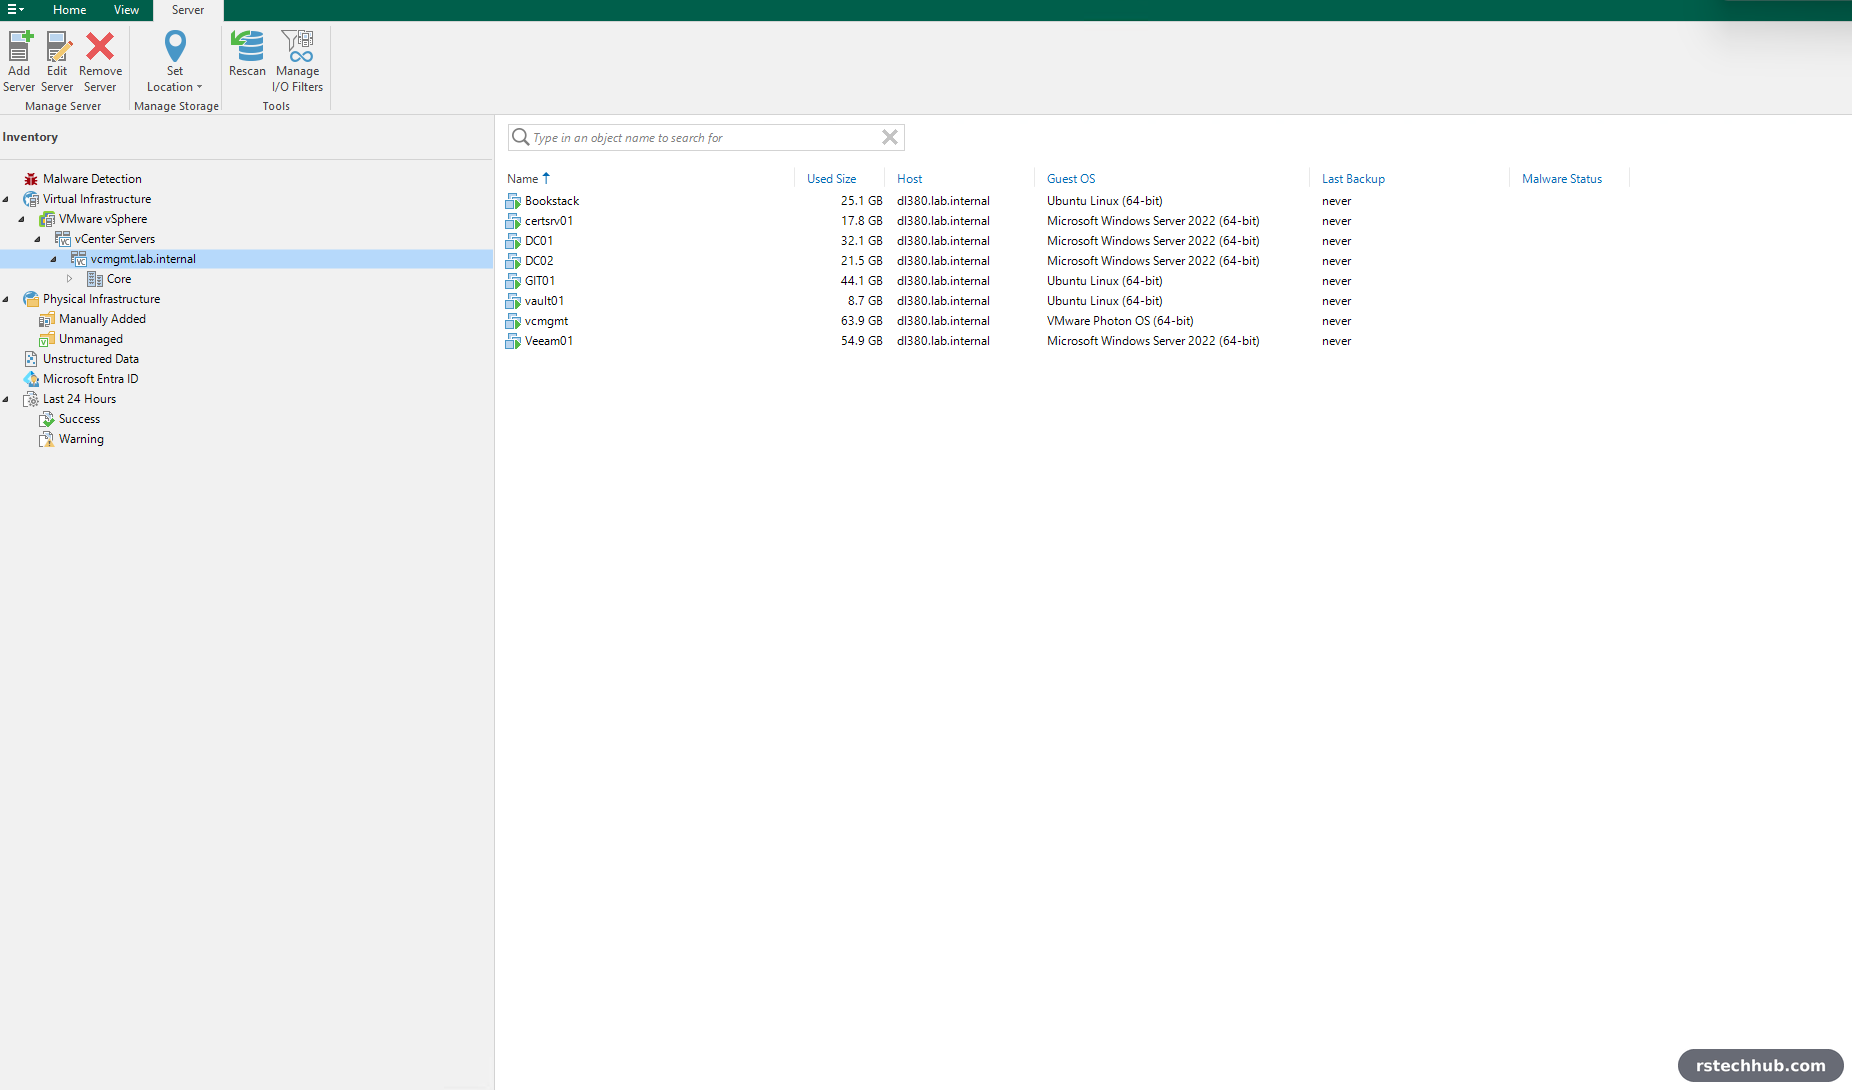
Then in Veeam: Inventory → Add Server → VMware vSphere → vSphere, the vCenter FQDN and the svc-veeam credentials. Every VM on the management host shows up.
Step 8: The first backup job
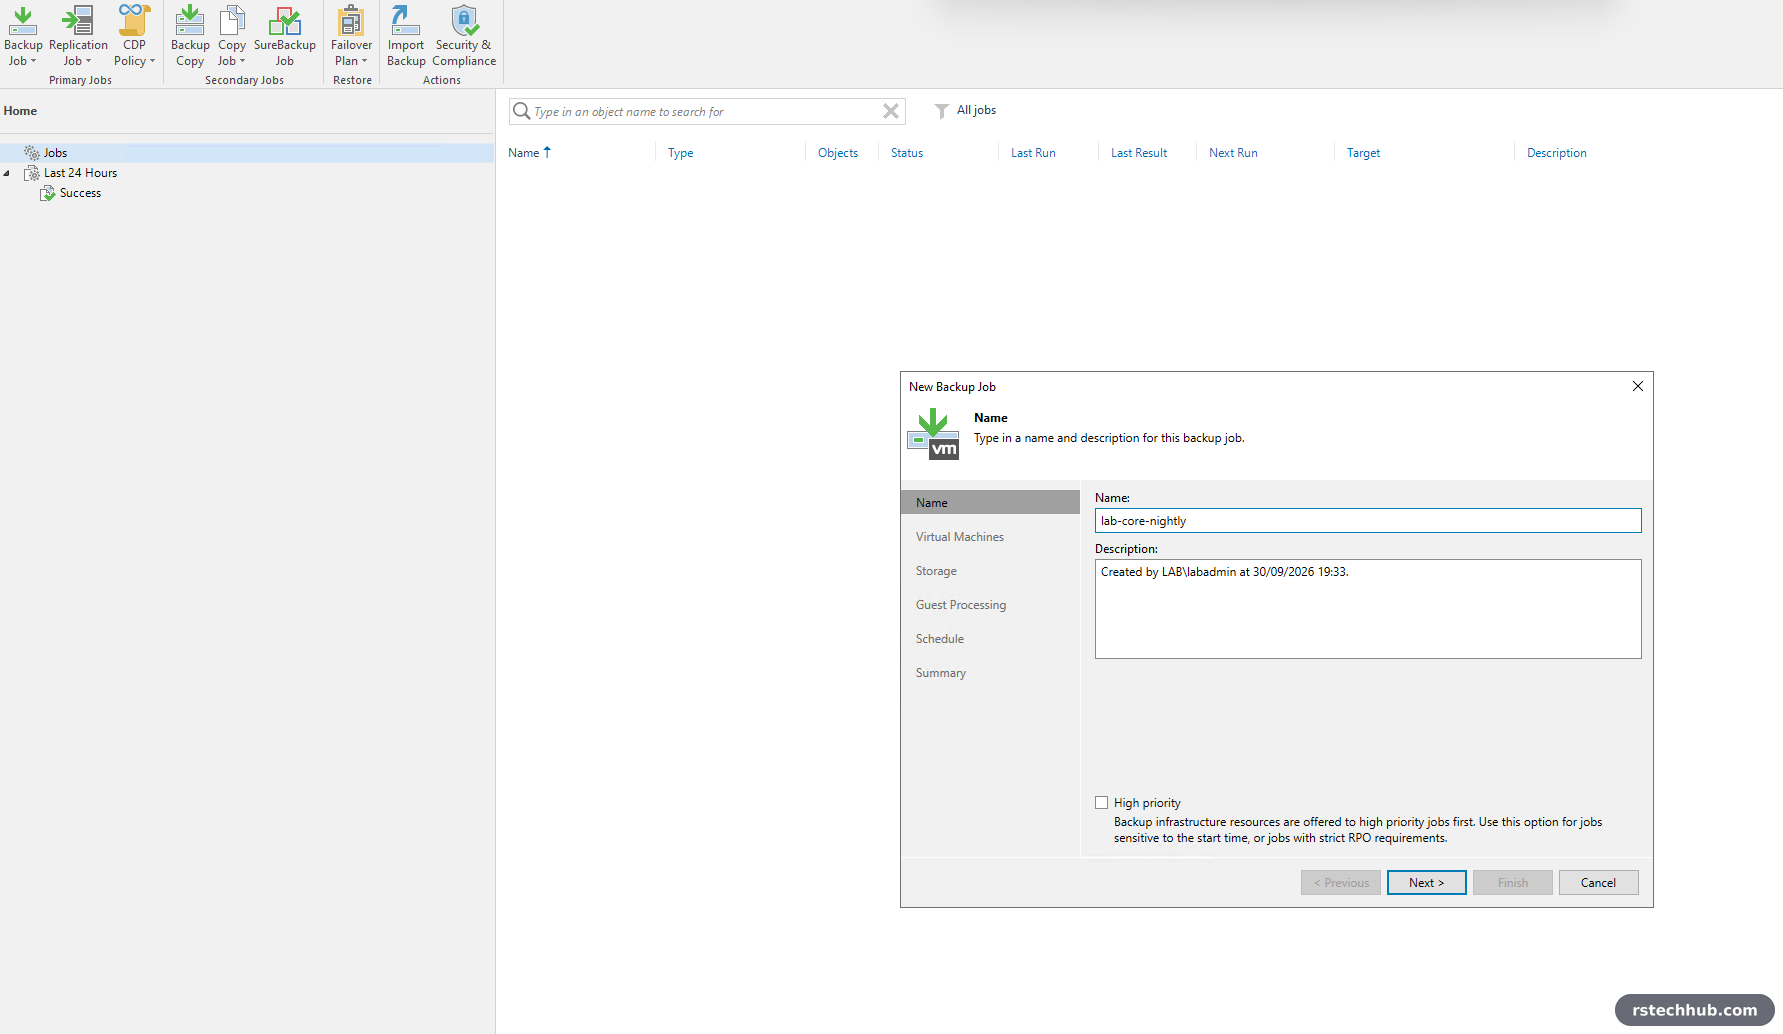
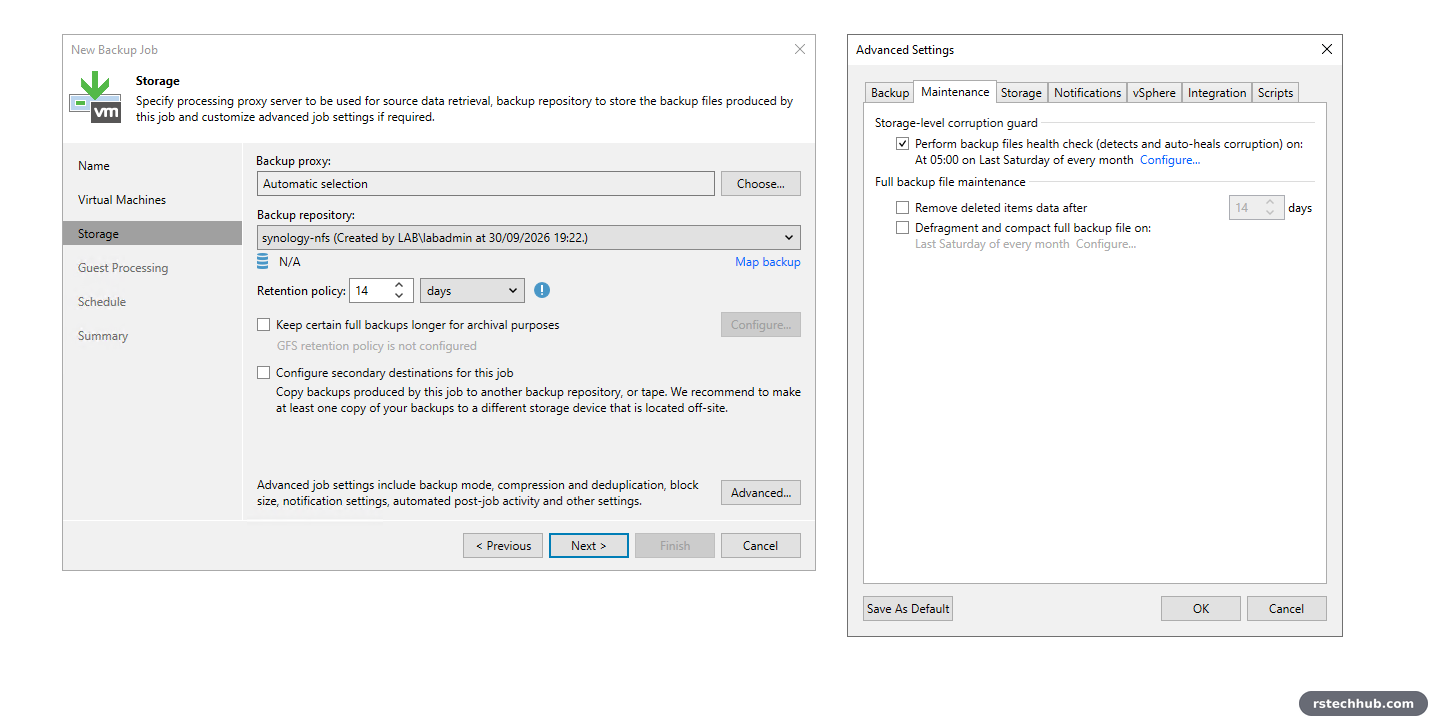
Home → Backup Job → Virtual machine. I called it lab-core-nightly and added every VM on the management host except veeam01 itself. Backing up the backup server with its own job is circular; the configuration backup from Step 6 is what rebuilds it.
| Setting | Value | Why |
|---|---|---|
| VMs | Bookstack, certsrv01, DC01, DC02, GIT01, vault01, vcmgmt | Everything except veeam01 |
| Repository | synology-nfs | |
| Retention | 14 days | Two weeks of restore points fits easily in 4 TB |
| Health check | Monthly (Advanced → Maintenance) | Catches corruption in the backup files, and the Btrfs checksums let DSM repair it |
| Synthetic fulls | Off | NFS has no block cloning, so a synthetic full is a slow full rewrite |
| Guest processing | Off for now | Server 2016 and later DCs restore safely from a crash-consistent backup; application-aware processing comes later |
| Schedule | Daily 22:00 | |
| Encryption | On (Step 9) | Separate password from the configuration backup |
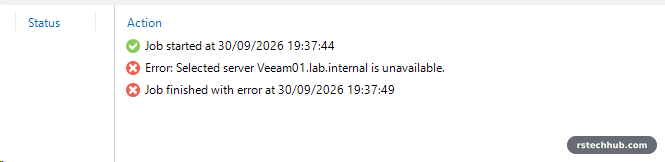
“Selected server is unavailable”
The first run failed in five seconds.
My first guess was DNS, since veeam01 has two NICs. It was not. One thing I learned on the way: Resolve-DnsName run on a server for its own name answers from the local network cards and never asks DNS, so it lists every address the box has, including IPv6 link-local ones. Add -Server <your DC> -DnsOnly to see what DNS really holds.
Resolve-DnsName veeam01.lab.internal -Server dc01.lab.internal -DnsOnly -Type AThe real answer was in Backup Infrastructure. The proxies, repositories and the server itself were all flagged Out of Date.
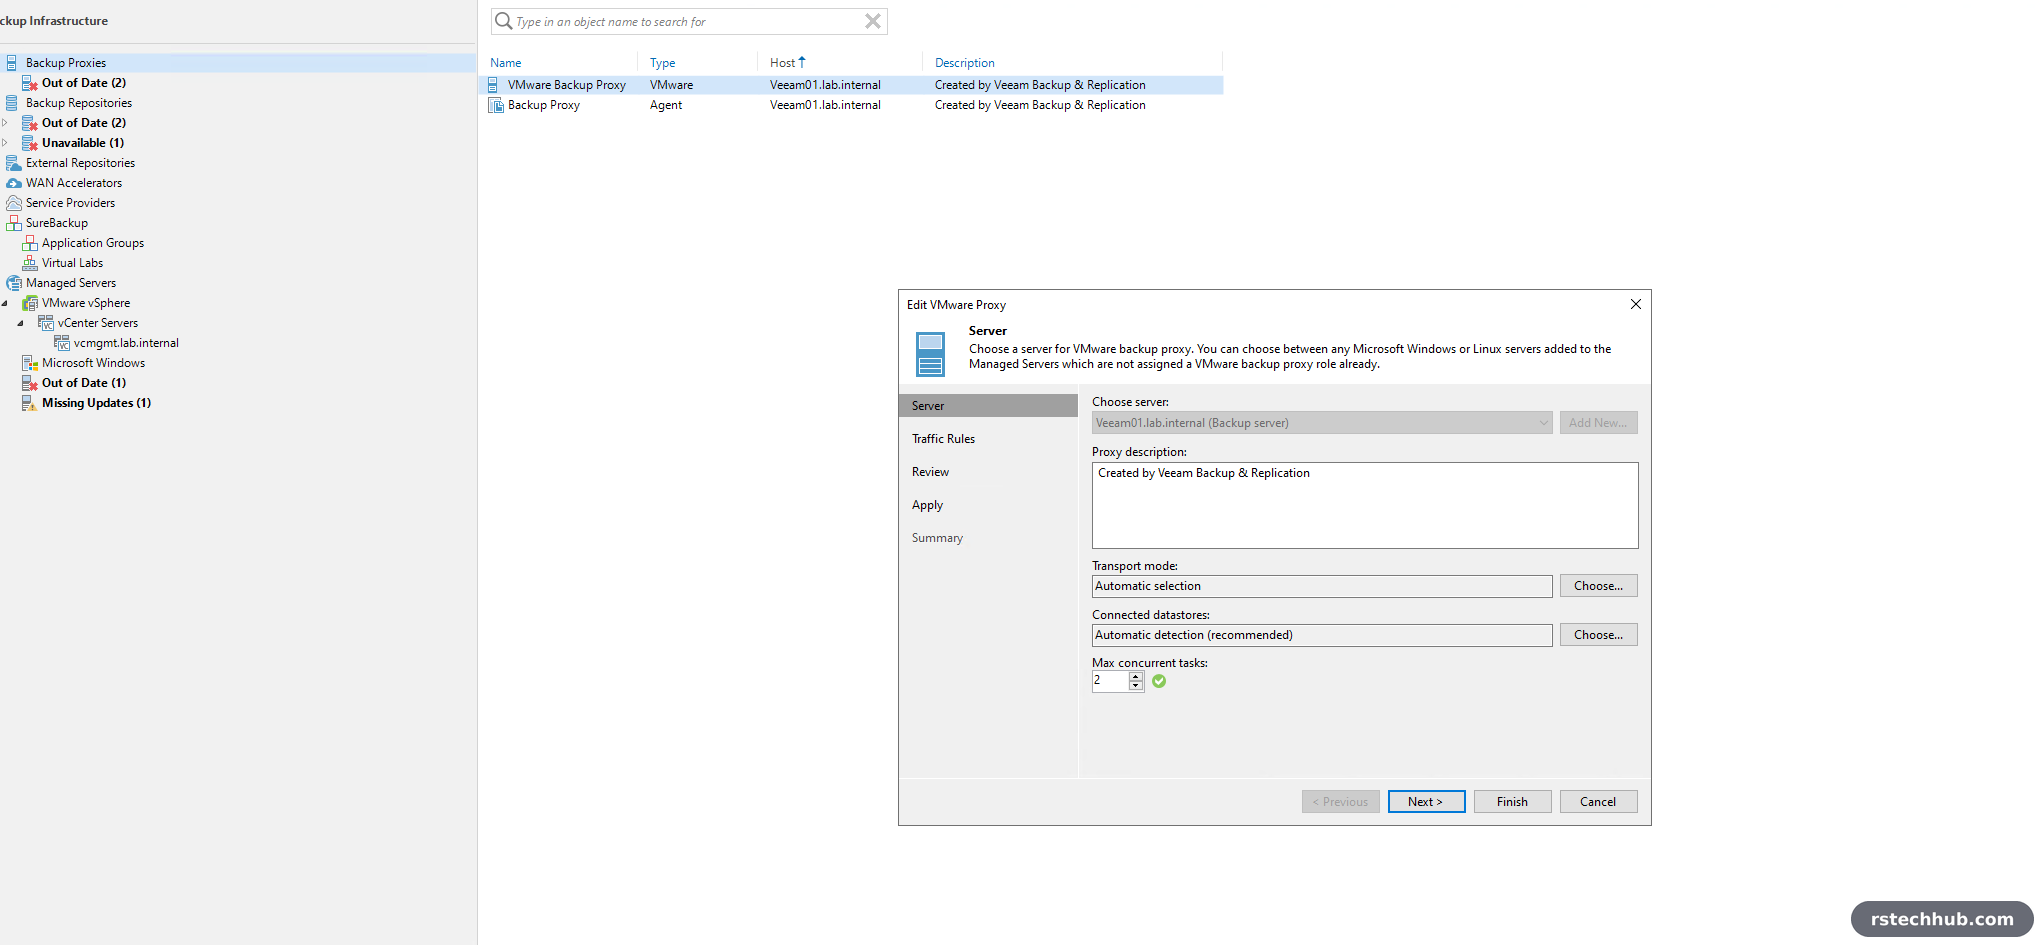
On first launch the console had offered a Components Update and I closed it. The component it wanted was Transport, the data mover that actually moves the backup data. Until it is updated, Veeam treats the server as unavailable to jobs, and the job error does not say so. Fix: Managed Servers → Out of Date, right-click the server, Upgrade.
The first full backup
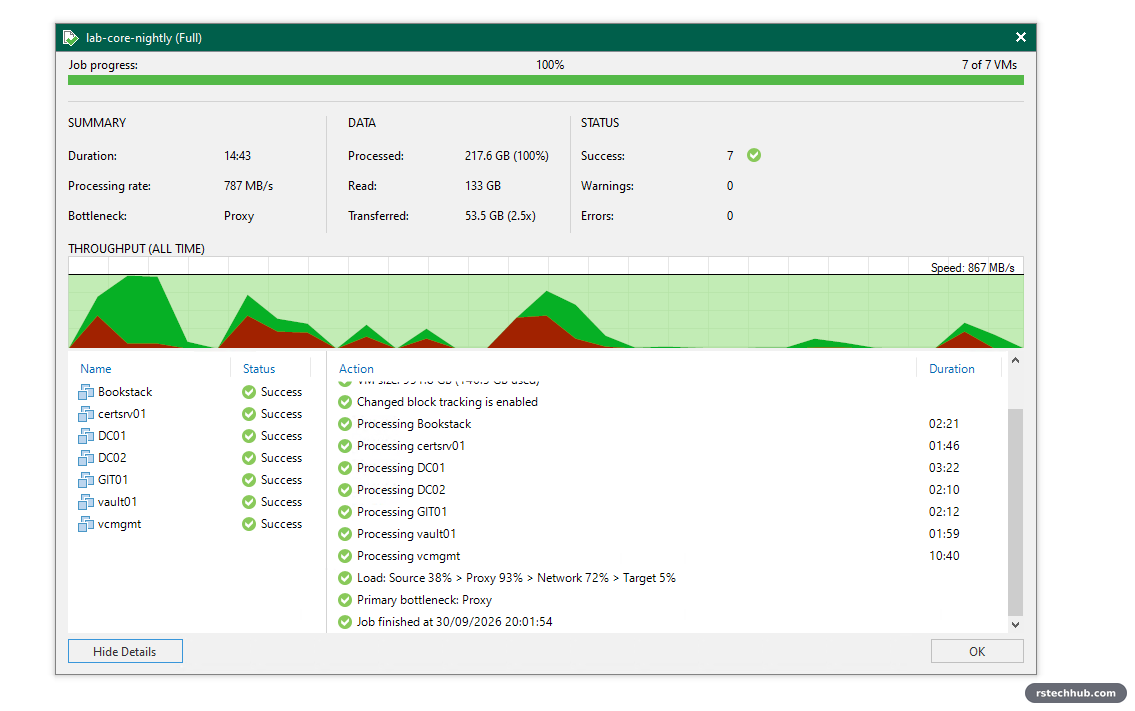
| Result | |
|---|---|
| Duration | 14 min 43 s for 7 VMs |
| Read | 133 GB (146.5 GB used on disk) |
| Written to the Synology | 53.5 GB, a 2.5× reduction |
| Processing rate | 787 MB/s, about 6.3 Gbit/s |
| Bottleneck | Proxy: Source 38%, Proxy 93%, Network 72%, Target 5% |
The Synology sat at 5% busy. The limit was veeam01’s CPU compressing the data, which is the proxy role. If I ever need it faster, more vCPUs for veeam01 and a higher Max concurrent tasks on the proxy (it is 2) are the levers. For a job that runs at 22:00 while I am not using the lab, 15 minutes for a full is more than good enough, and the nightly incrementals only read changed blocks.
Prove it: a file-level restore
A backup I have never restored from is a hope, not a backup. The quickest proof is a single file. I picked certsrv01, a Windows VM, because the Windows file restore mounts the backup straight onto the backup server with no helper appliance. (For a Linux VM such as GIT01, Veeam boots a small temporary appliance on the host to read the disks.)
Home → Backups → Disk → lab-core-nightly, right-click the VM, Restore guest files → Microsoft Windows.
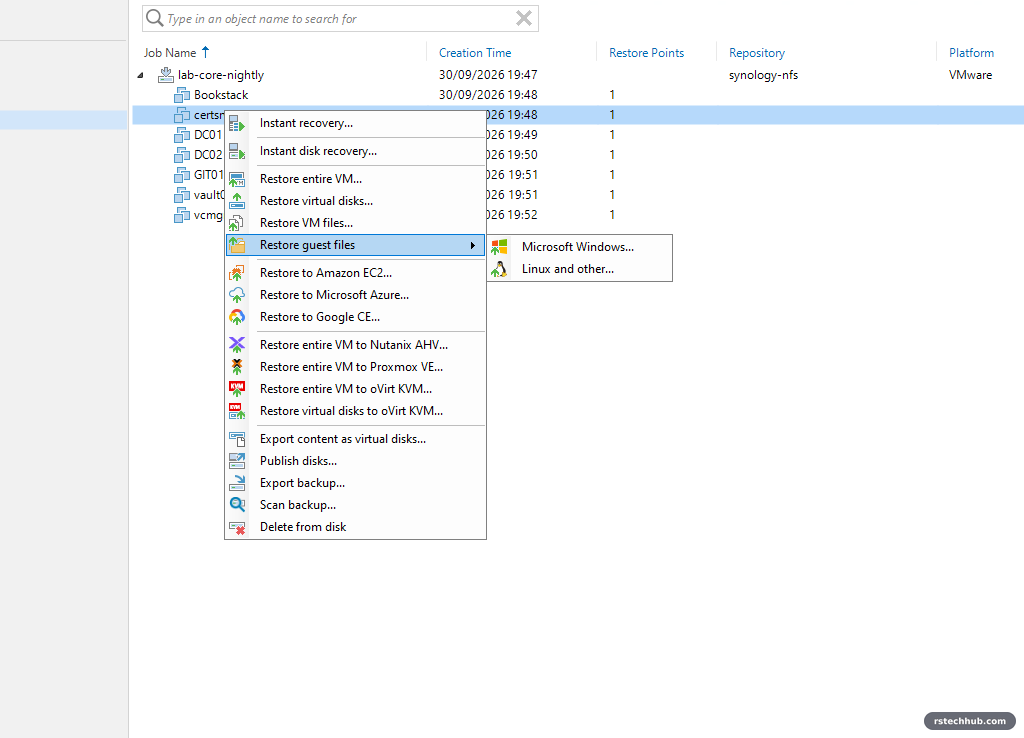
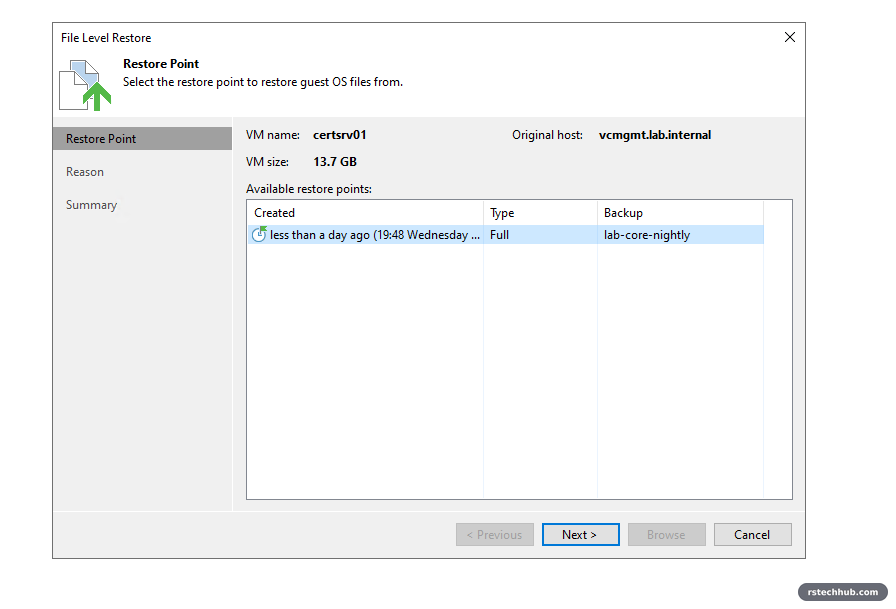
After a reason and Browse, the Backup Browser opens with the VM’s C: drive as it was at 19:48. The live VM is not touched: the disks are mounted read-only on veeam01.
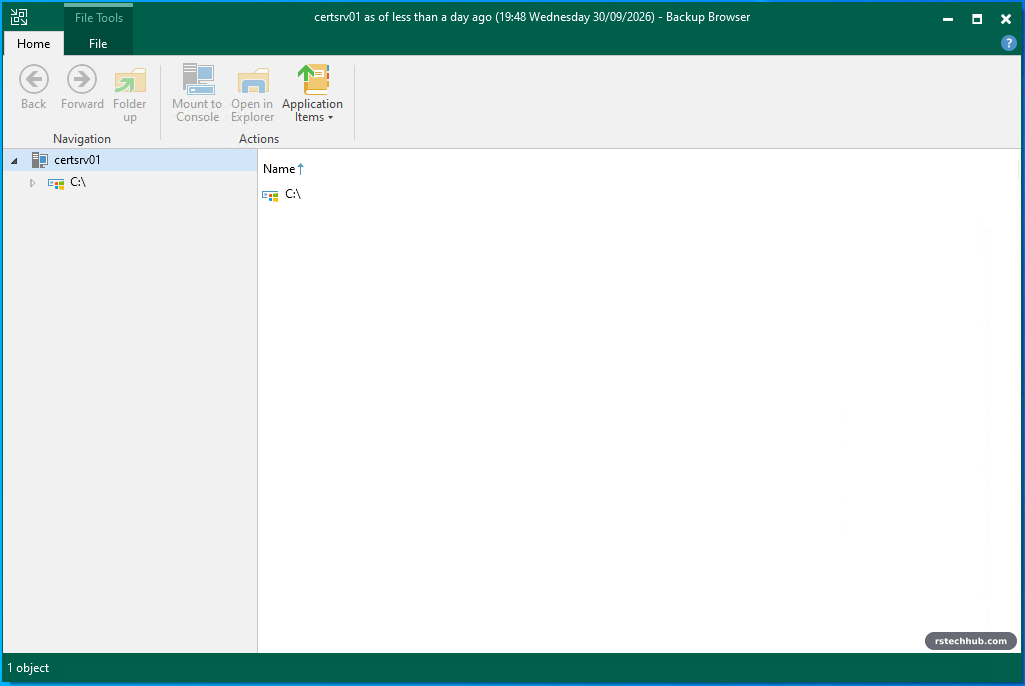
I copied C:\Windows\System32\drivers\etc\hosts out with Copy To into C:\RestoreTest on veeam01, then checked it:
PS C:\> Get-Item C:\RestoreTest\hosts | ft Name, Length, LastWriteTime

Name  Length LastWriteTime
----  ------ -------------
hosts    824 08/05/2021 09:18:32
824 bytes and a 2021 timestamp: the untouched Windows hosts file, exactly what should be there. Closing the Backup Browser unmounts the backup. That is the restore path proven end to end: VM → proxy → Synology → back out again.
Step 9: Encrypt the backups, then make them faster
Backup encryption
The backups sit on a NAS that other things can reach, so I turned on job encryption: Edit job → Storage → Advanced → Storage → Enable backup file encryption. Use a different password from the configuration backup, so one leak does not open both, and put it in the password manager before you click OK. The next run is a new full, which is expected.
Why a nightly incremental took 13 minutes
The first incremental worked, and CBT did its job: 2.5 GB read out of 146.7 GB. It still took 13 minutes, and vcmgmt alone took 10 of them.
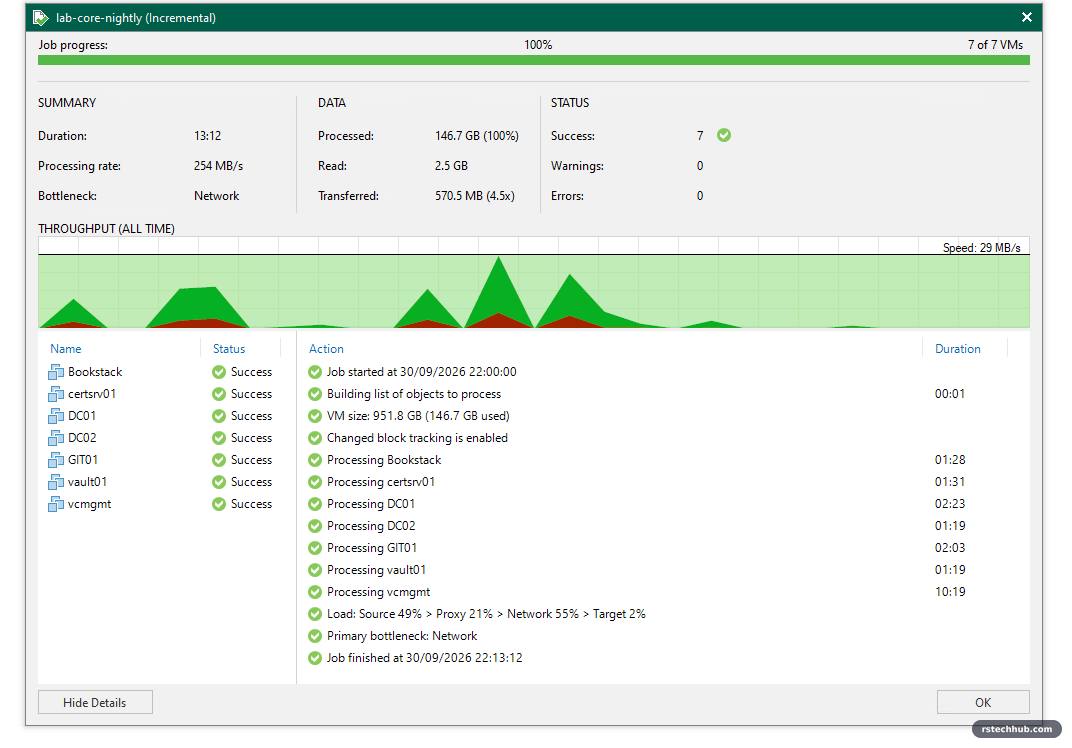
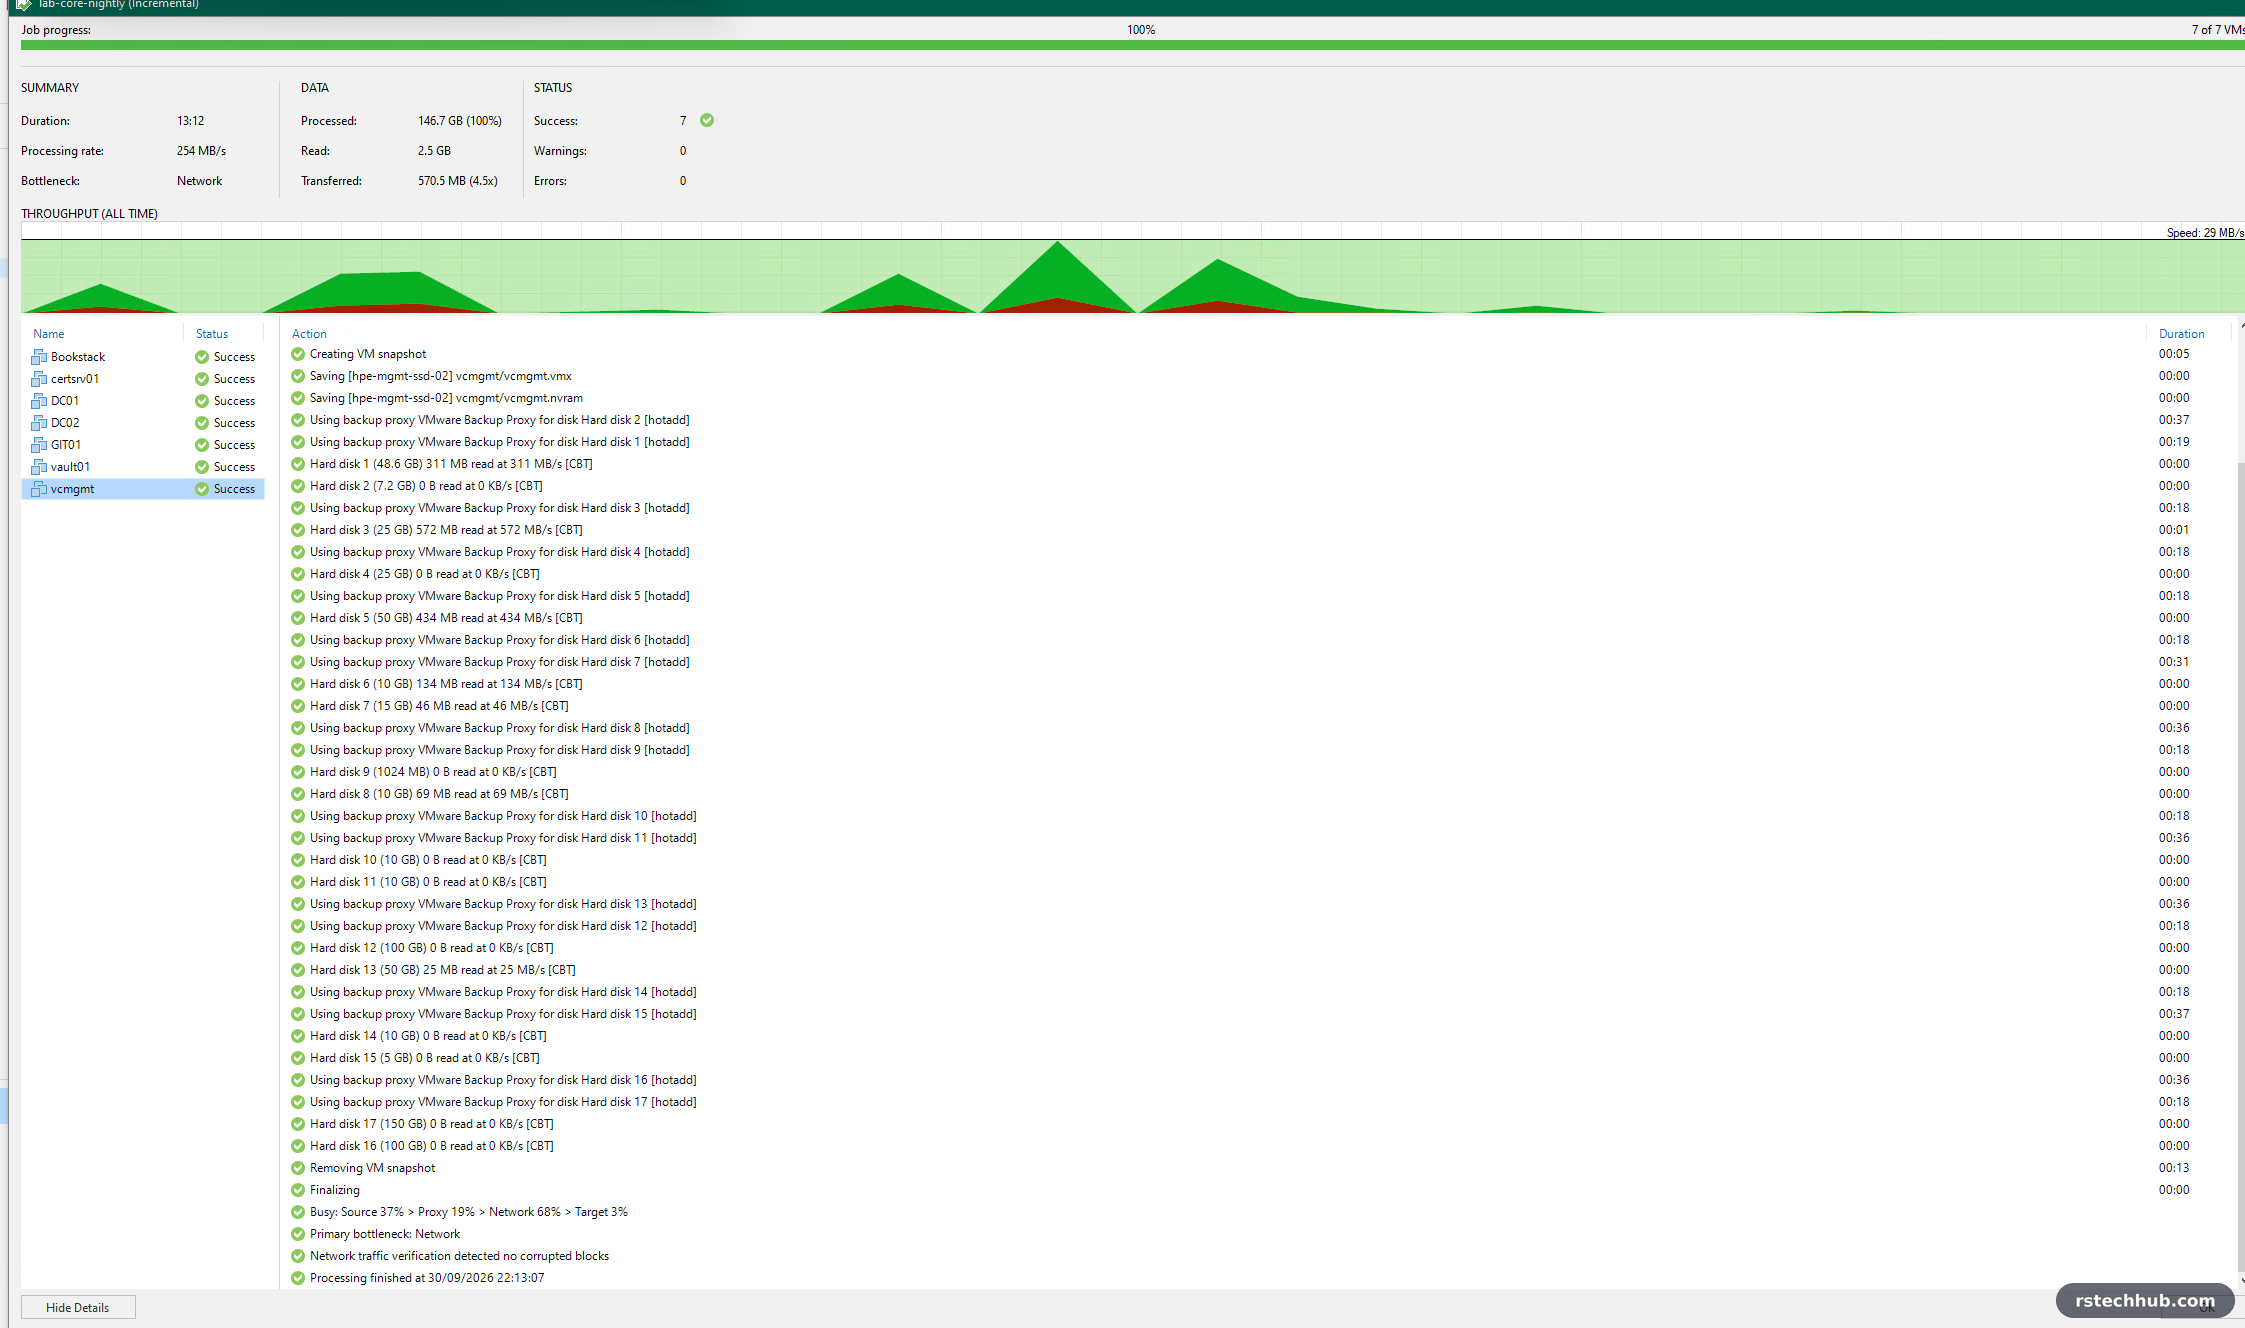
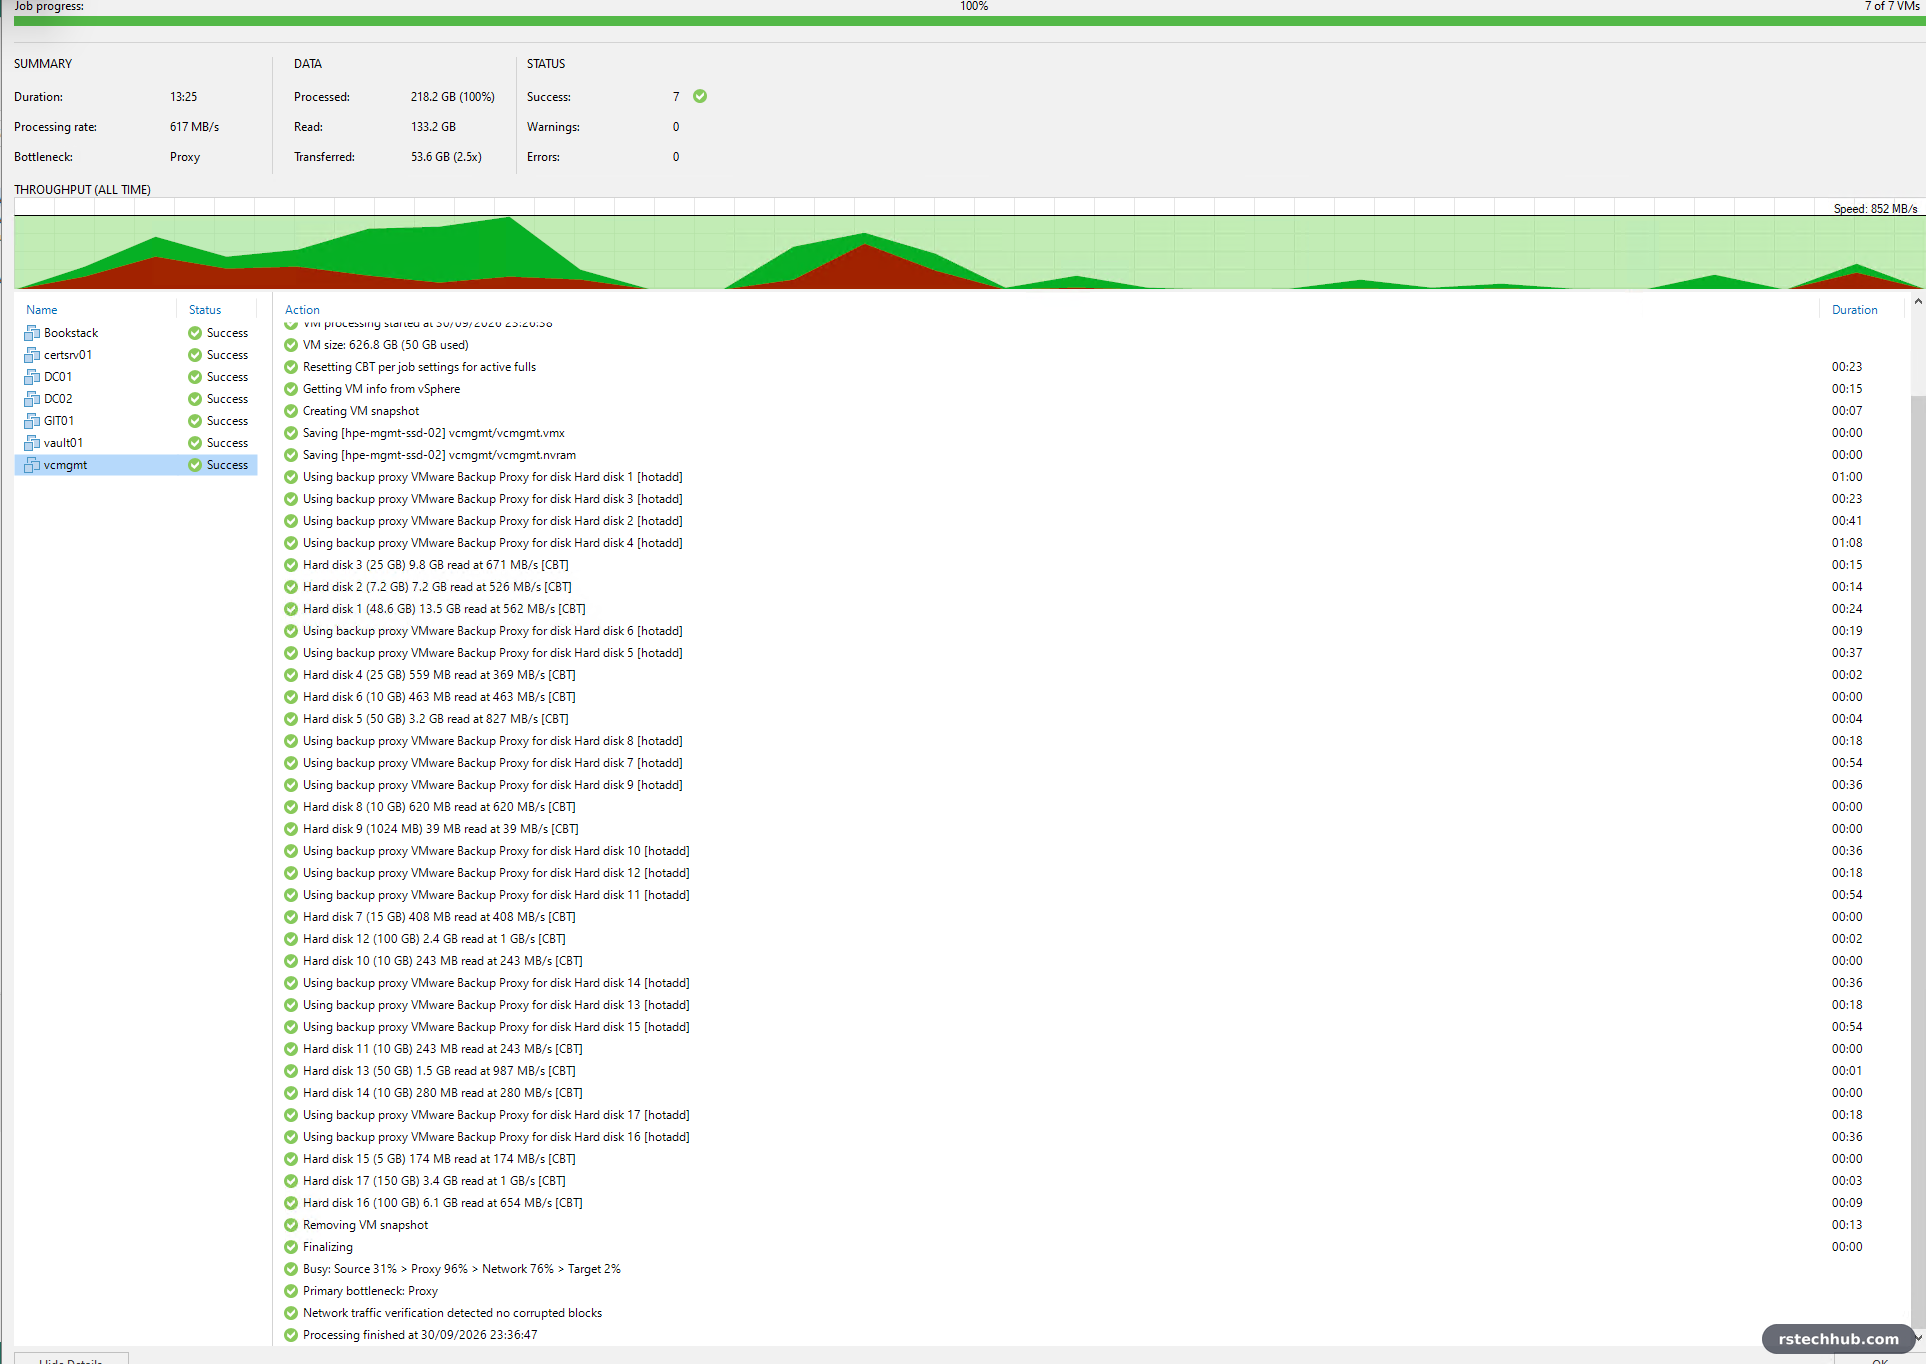
Clicking vcmgmt in the job window shows why. The vCenter appliance has 17 virtual disks, and the proxy was using hot-add: for every disk, Veeam attaches it to veeam01, reads it, and detaches it again. Each attach took 18 to 37 seconds. The reads themselves took no time at all, because most disks had not changed.
More tasks did not help
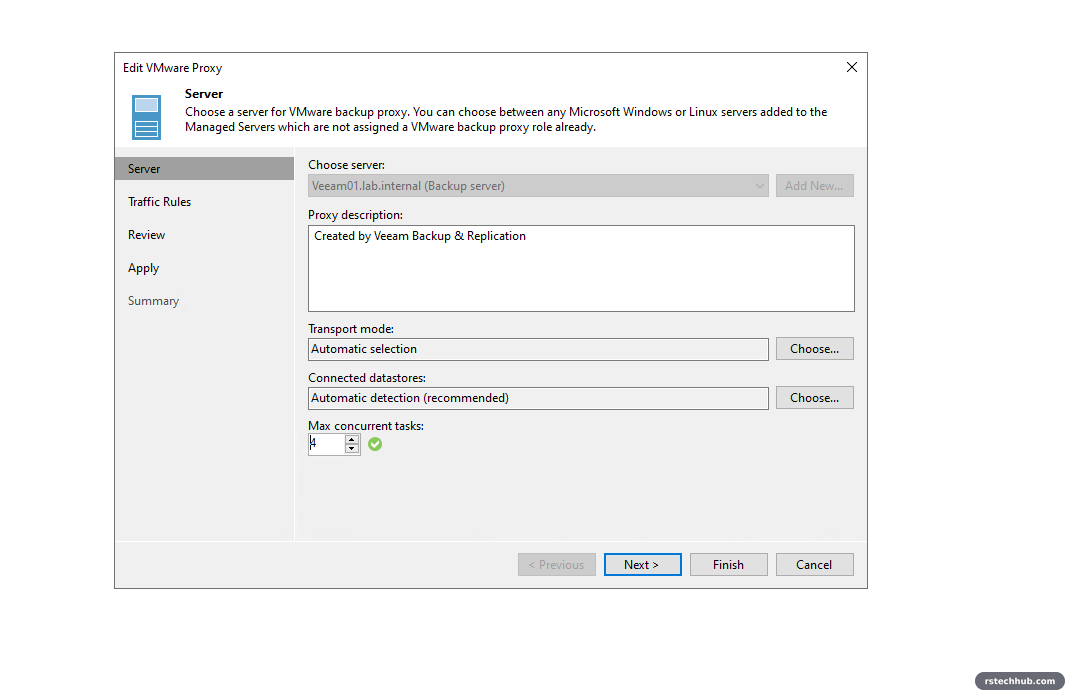
veeam01 has 4 vCPUs, so I raised the proxy from 2 to 4 concurrent tasks (one per vCPU, about 2 GB RAM each).
The encrypted full with 4 tasks took 13:25, barely faster, with the proxy at 95% CPU. The per-disk log showed the attaches running four at a time but each one getting slower, up to 68 seconds. vCenter processes those reconfigure requests more or less one after another, so parallel attaches mostly queue.
Network mode: 13 minutes down to 2½
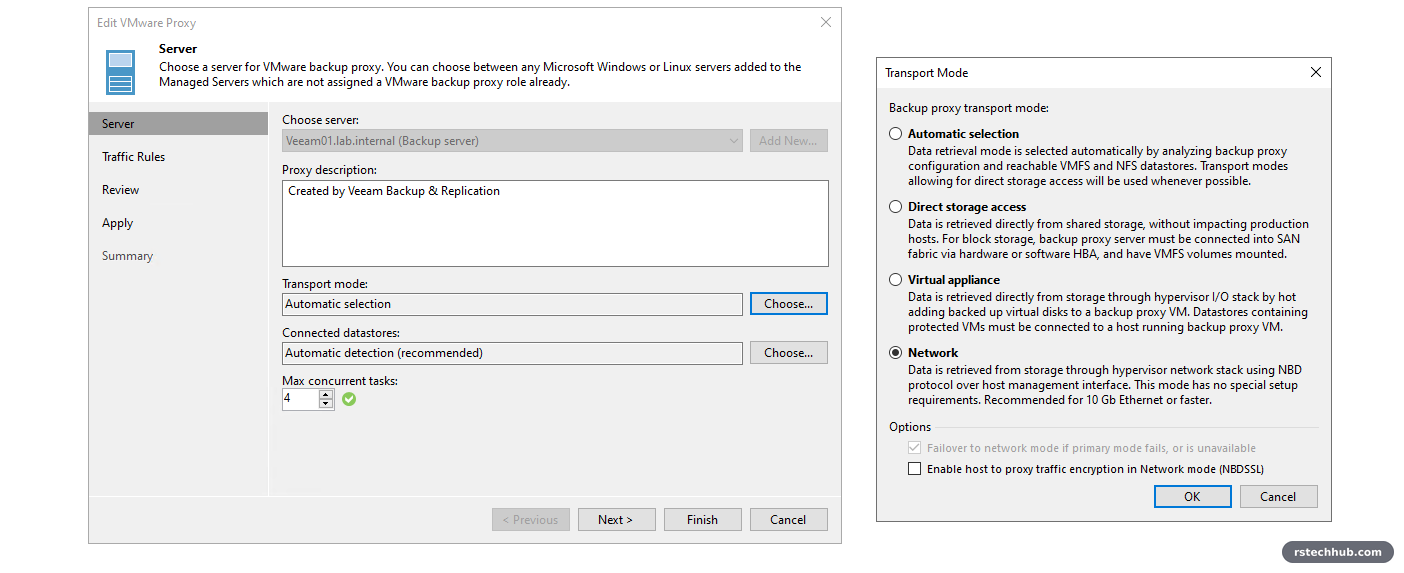
The fix was the transport mode. Backup Proxies → Properties → Transport mode → Network. Network mode (NBD) reads the disks straight from the ESXi host over its management network, so there is nothing to attach. Veeam’s own description says it is recommended for 10 Gb Ethernet, and the management vmk on this host is 10 Gbit. I left NBDSSL off: the backup files are already encrypted, and the proxy had no CPU to spare.
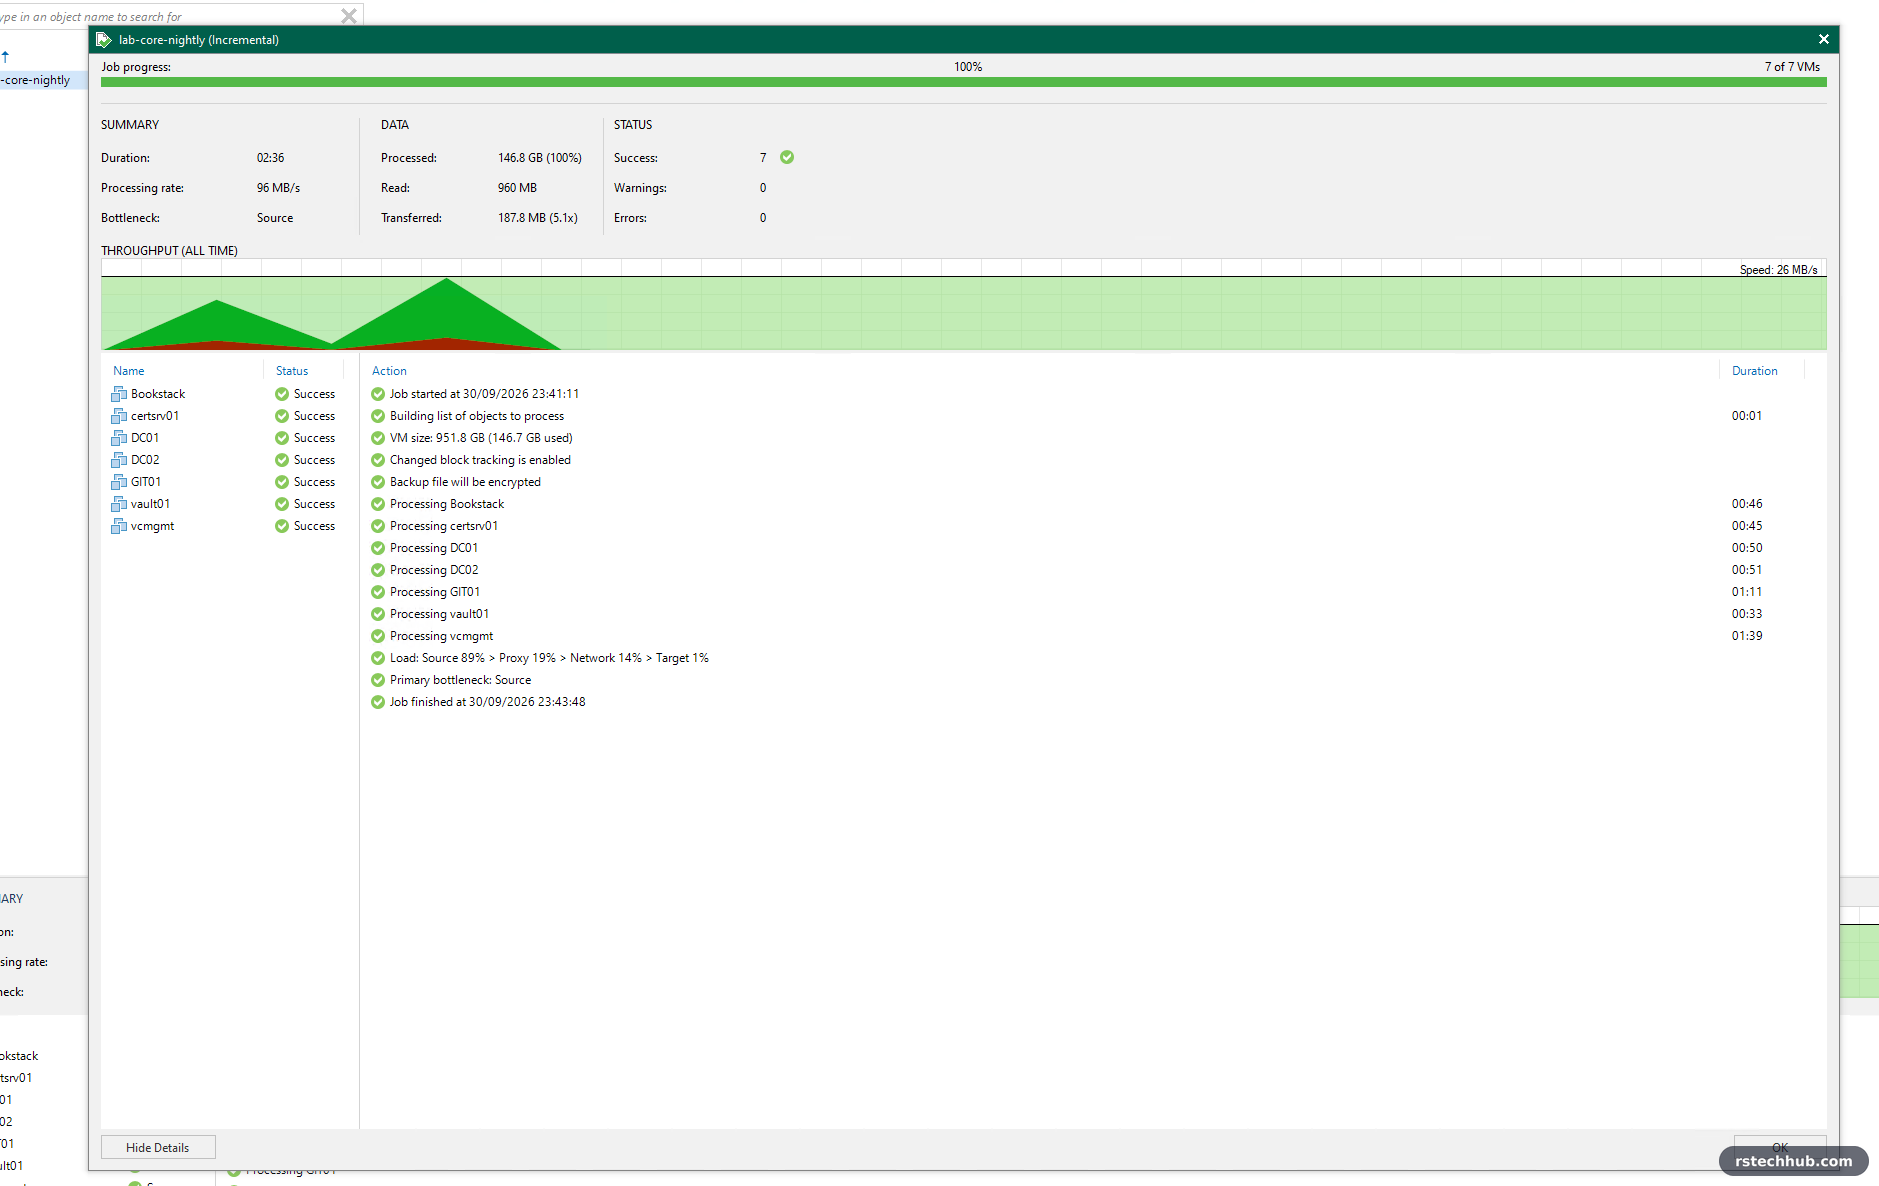
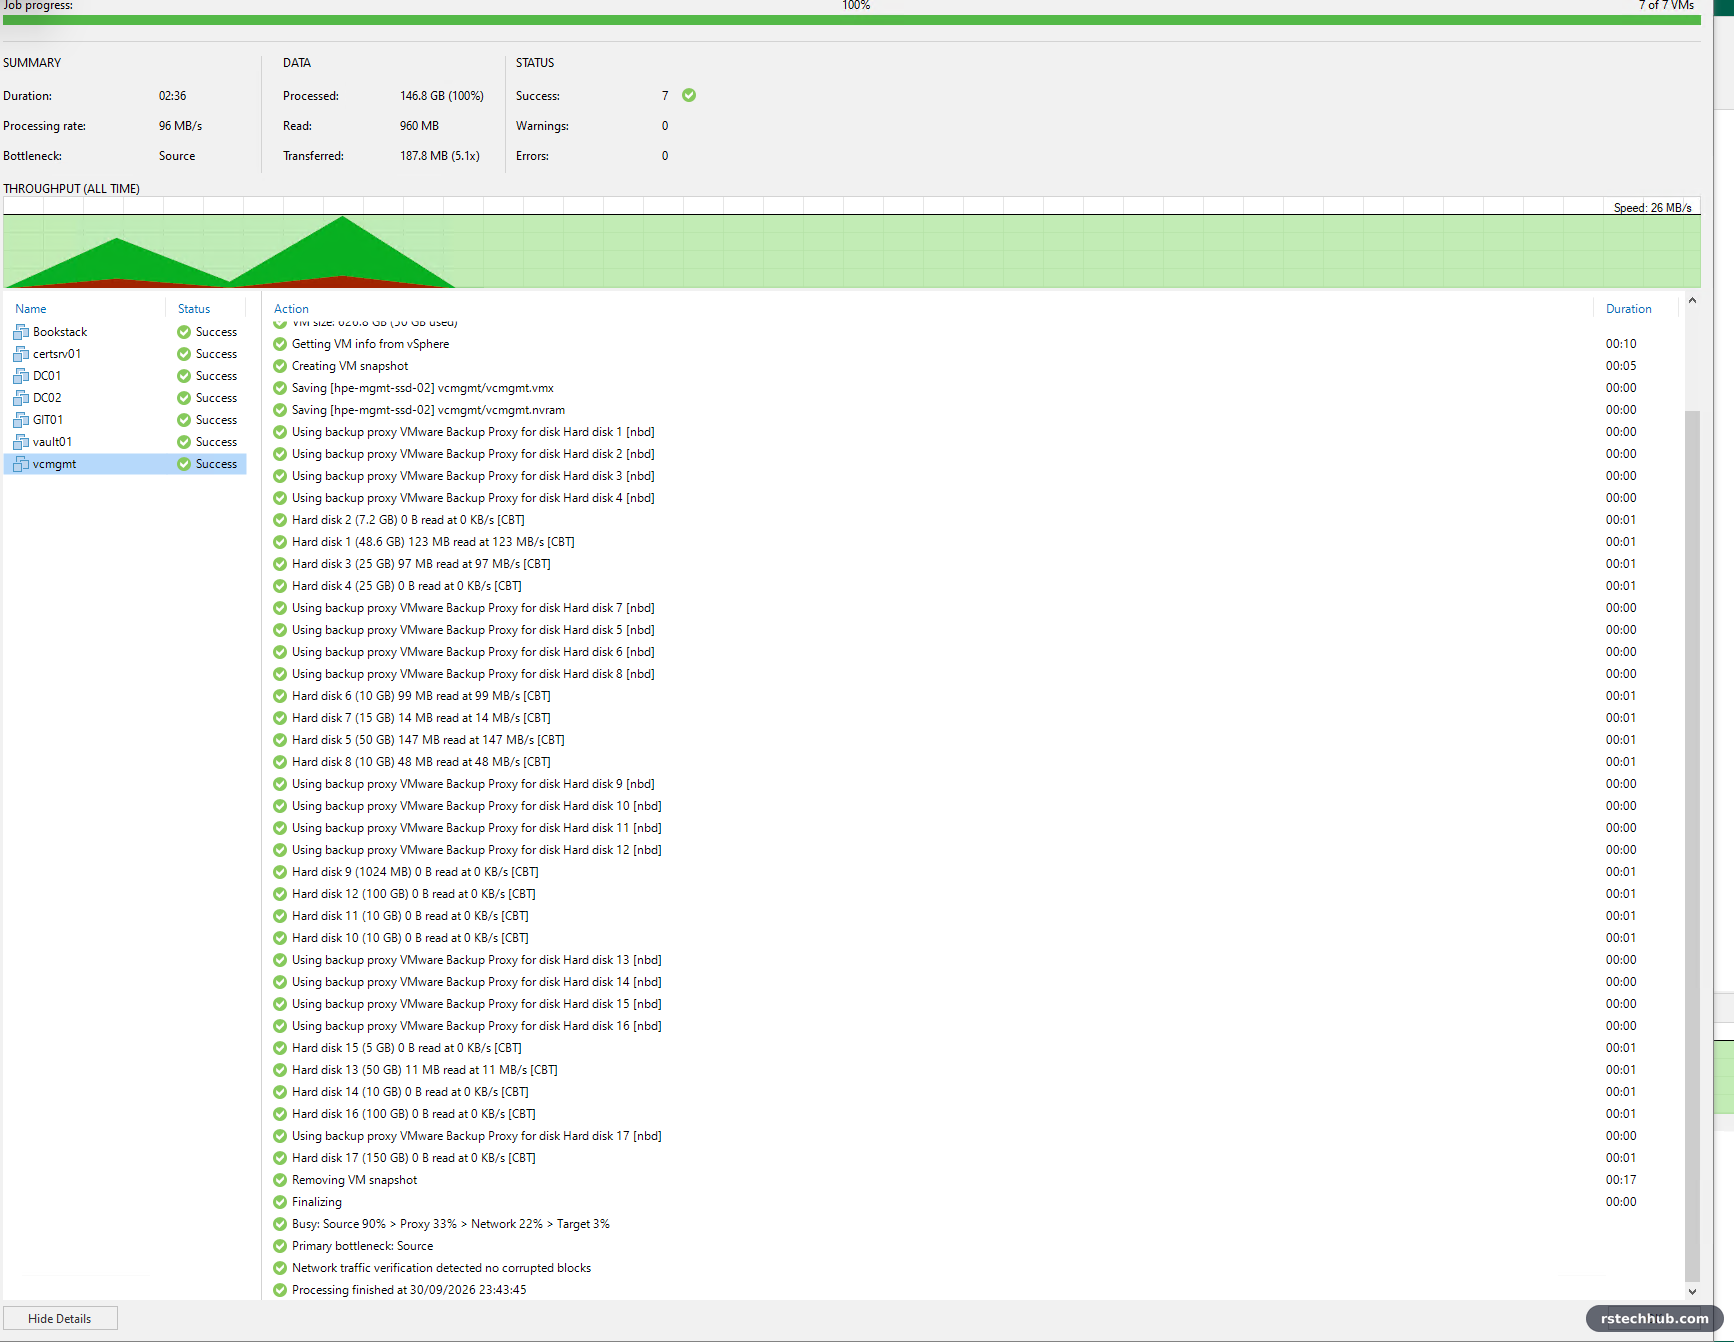
| Nightly incremental | Transport | Tasks | Total | vcmgmt |
|---|---|---|---|---|
| Before | Hot-add | 2 | 13:12 | 10:19 |
| After | Network (NBD) | 4 | 2:36 | 1:39 |
Two caveats. The second run had less changed data (960 MB against 2.5 GB), so the next scheduled run is the fairer comparison. And full backups may be a little slower in Network mode than the 617 MB/s hot-add gave me, since NBD goes through the host’s management stack. Fulls happen once; incrementals happen every night. For a VM with lots of small disks, like the vCenter appliance, hot-add is the wrong default, and Automatic selection picks it because veeam01 is a VM on the same host.
Next
Tonight’s job runs at 22:00 and from then on only changed blocks travel. Part 2 adds the copy that ransomware cannot delete: this share sits on a Btrfs volume, so the options are DSM immutable snapshots on the Synology itself or a Veeam hardened Linux repository, and I will try both. After that comes the in-place upgrade from 12.3 to 13.1, which is the reason this build started on 12 in the first place. Part 2: Backups Nobody Can Delete is now live.