
Ubuntu runs more of this lab than I expected. The Git server from Part 6 is Ubuntu, so are the BookStack box and the Veeam hardened repository, and the VCF 9 build needs one more: a tools VM that builds kickstart ISOs for the ESX hosts and serves as the offline depot. Every one of those started from an ISO and twenty minutes of clicking through the installer. That stops here.
In Part 7 I built a Windows Server 2022 template with a customization spec. This is the Linux version of the same idea: install Ubuntu 24.04.5 once, seal it, convert it to a vSphere template, and let a customization spec give each clone its own name and static IP.
What I wanted from the template
- Patched Ubuntu 24.04 LTS server, nothing extra installed.
- The whole disk usable, with LVM so it can grow later.
- Name, IP and DNS set by vCenter at deploy time, not by me in a console.
- No shared identity between clones: fresh SSH host keys and a fresh machine-id on every one.
- Time from the domain controllers and UK time zone out of the box.
Step 1: Download and verify the ISO
I took the latest point release, ubuntu-24.04.5-live-server-amd64.iso, from releases.ubuntu.com. I check every download against the vendor’s hash before it goes near the lab, and Ubuntu publishes a SHA256SUMS file next to the ISO for exactly this.
First gotcha, a small one: my browser opened SHA256SUMS as a page instead of saving it, so the comparison came back empty. Pulling it with PowerShell is quicker anyway:
cd 'D:\LAB Binaries\Ubuntu'
Invoke-WebRequest https://releases.ubuntu.com/24.04/SHA256SUMS -OutFile SHA256SUMS
$iso  = Get-ChildItem *live-server-amd64.iso
$mine = (Get-FileHash $iso).Hash
$official = ((Select-String -Path .\SHA256SUMS -Pattern $iso.Name).Line -split '\s+')[0]
"Mine:     $mine"
"Official: $official"
"Match:    $($mine -eq $official)"
Mine: 97F3D7FFB032C3EB3B23D2C8BE9CC76E60C2C1F2C0146BA5BA9FE01CAFAE0FD8
Official: 97f3d7ffb032c3eb3b23d2c8be9cc76e60c2c1f2c0146ba5ba9fe01cafae0fd8
Match: TruePowerShell’s -eq ignores case, so the upper and lower case hex compare fine. Then I uploaded the ISO to the ISO folder on the management host’s datastore.
Step 2: Create the VM
| Setting | Value |
|---|---|
| Name | Ubuntu_24.04.5_Template |
| Guest OS | Linux, Ubuntu Linux (64-bit) |
| CPU / memory | 2 vCPU / 4 GB |
| Disk | 40 GB, thin |
| Network | VMXNET3 on the management VLAN |
| Firmware | EFI (default) |
| CD/DVD | The Ubuntu ISO, connected at power on |
40 GB is plenty for a base image. Clones that need room for data get a second disk, which keeps the OS disk the same everywhere.
Step 3: The installer
Most screens are a straight Enter. These are the ones where I made a choice:
- Language: English (UK). It sets the en_GB locale, which is what I want on a UK lab.
- Type of install: Ubuntu Server, not the minimized version. Minimized strips out tools I’d only end up installing again.
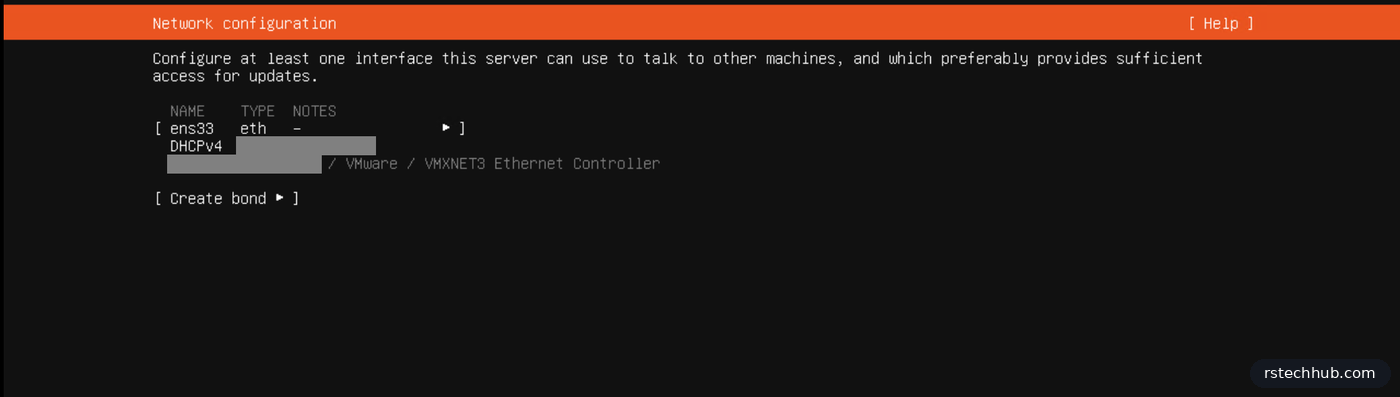
- Network: left on DHCP. The router’s pool hands out an address for the install and the updates; the customization spec sets static addresses on the clones later.
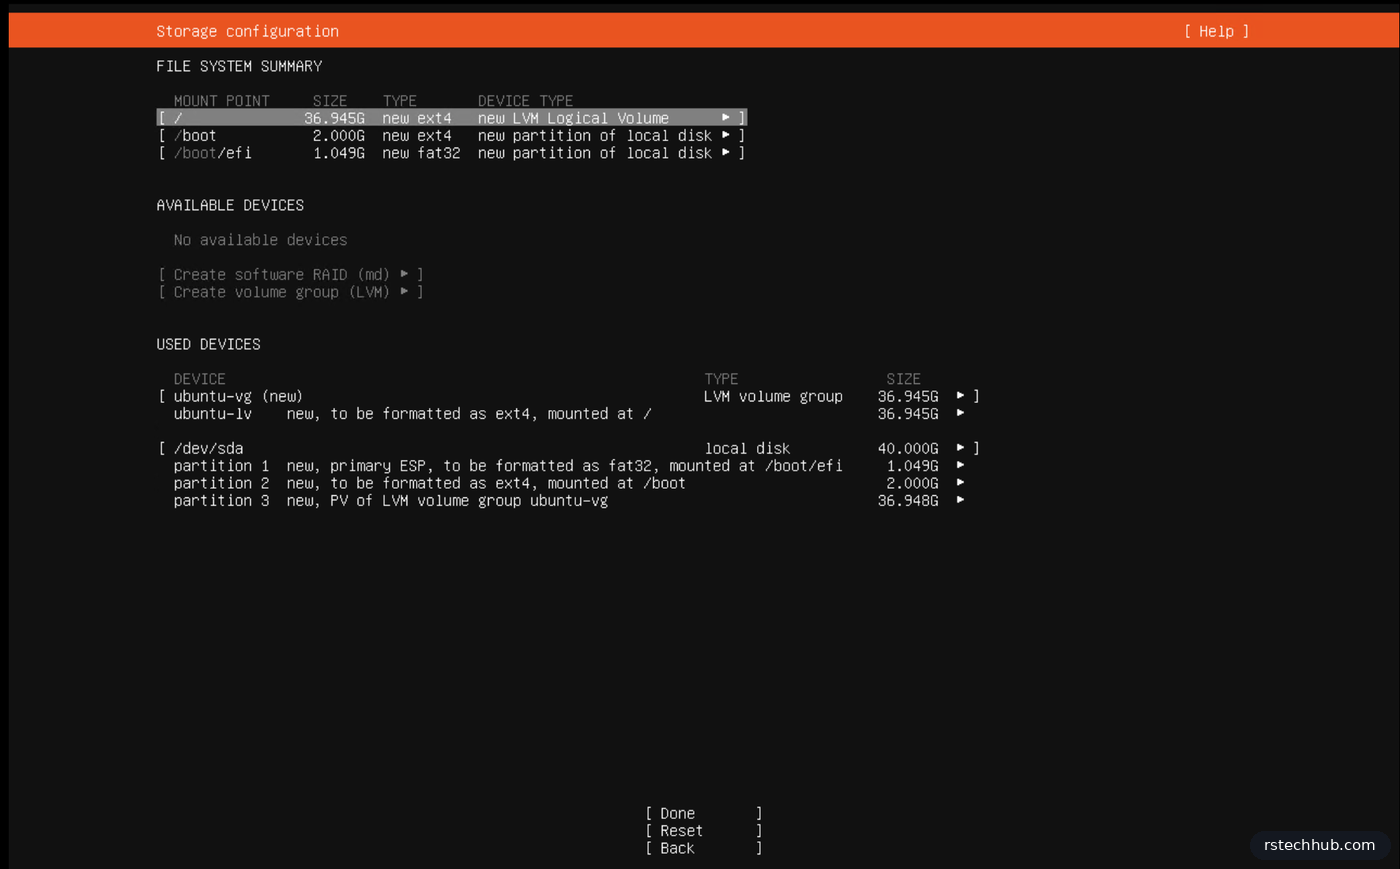
- Storage: use the entire disk, set up as LVM, no encryption.
- Server name: tpl-ubuntu-2405, after the 24.04.5 point release, so I can tell at a glance which build a clone came from.
- Ubuntu Pro: skipped.
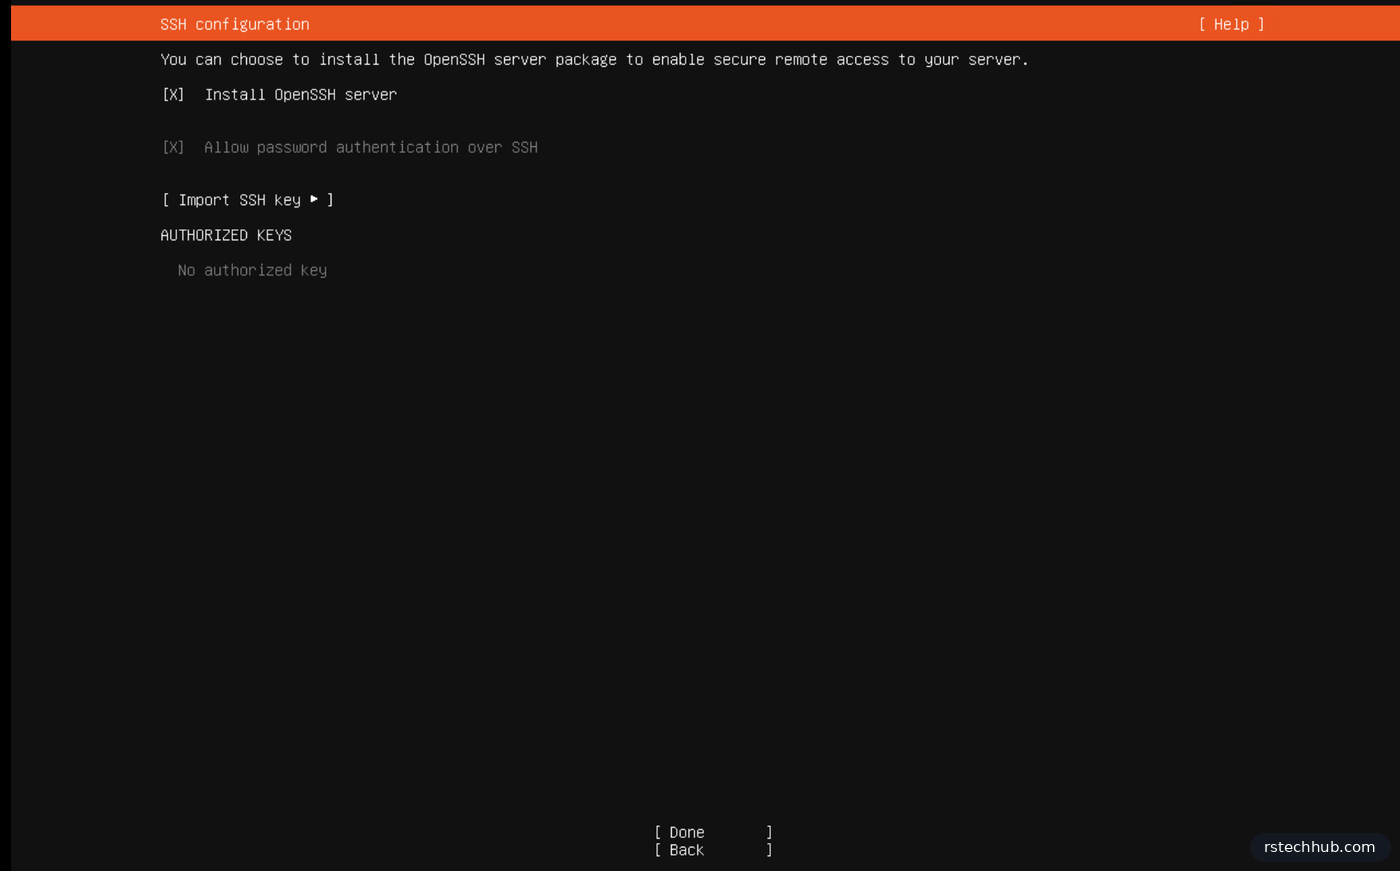
- OpenSSH: installed, with password login for now.
- Featured snaps: none. PowerShell is in that list and I was tempted, but the template stays generic. PowerShell goes onto the one VM that needs it, from Microsoft’s apt repository.
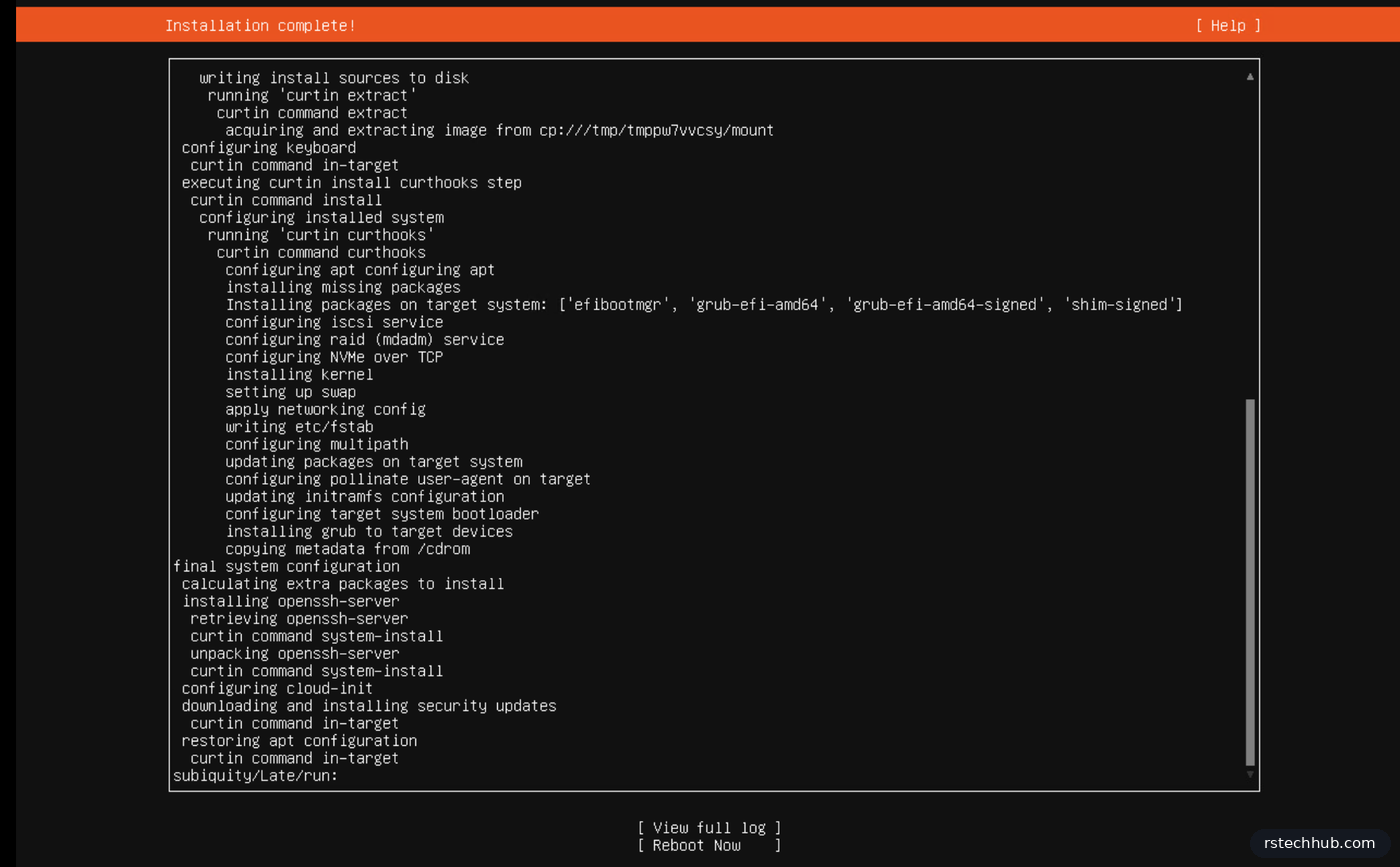
The storage summary deserves a second look. On bigger disks the guided LVM layout only gives the root volume part of the volume group and leaves the rest unallocated, the same kind of hidden-space surprise I hit with the Windows template’s recovery partition in Part 7. On this 40 GB disk it took the whole thing: ubuntu-lv is 36.945G, the same as ubuntu-vg. If yours is smaller, select ubuntu-lv, choose Edit and set the size to the maximum before you carry on.
The install pulls security updates on its way through, so it took a few minutes. Before choosing Reboot Now I disconnected the CD in Edit Settings, which saves the “remove the installation medium” prompt.
Step 4: First boot
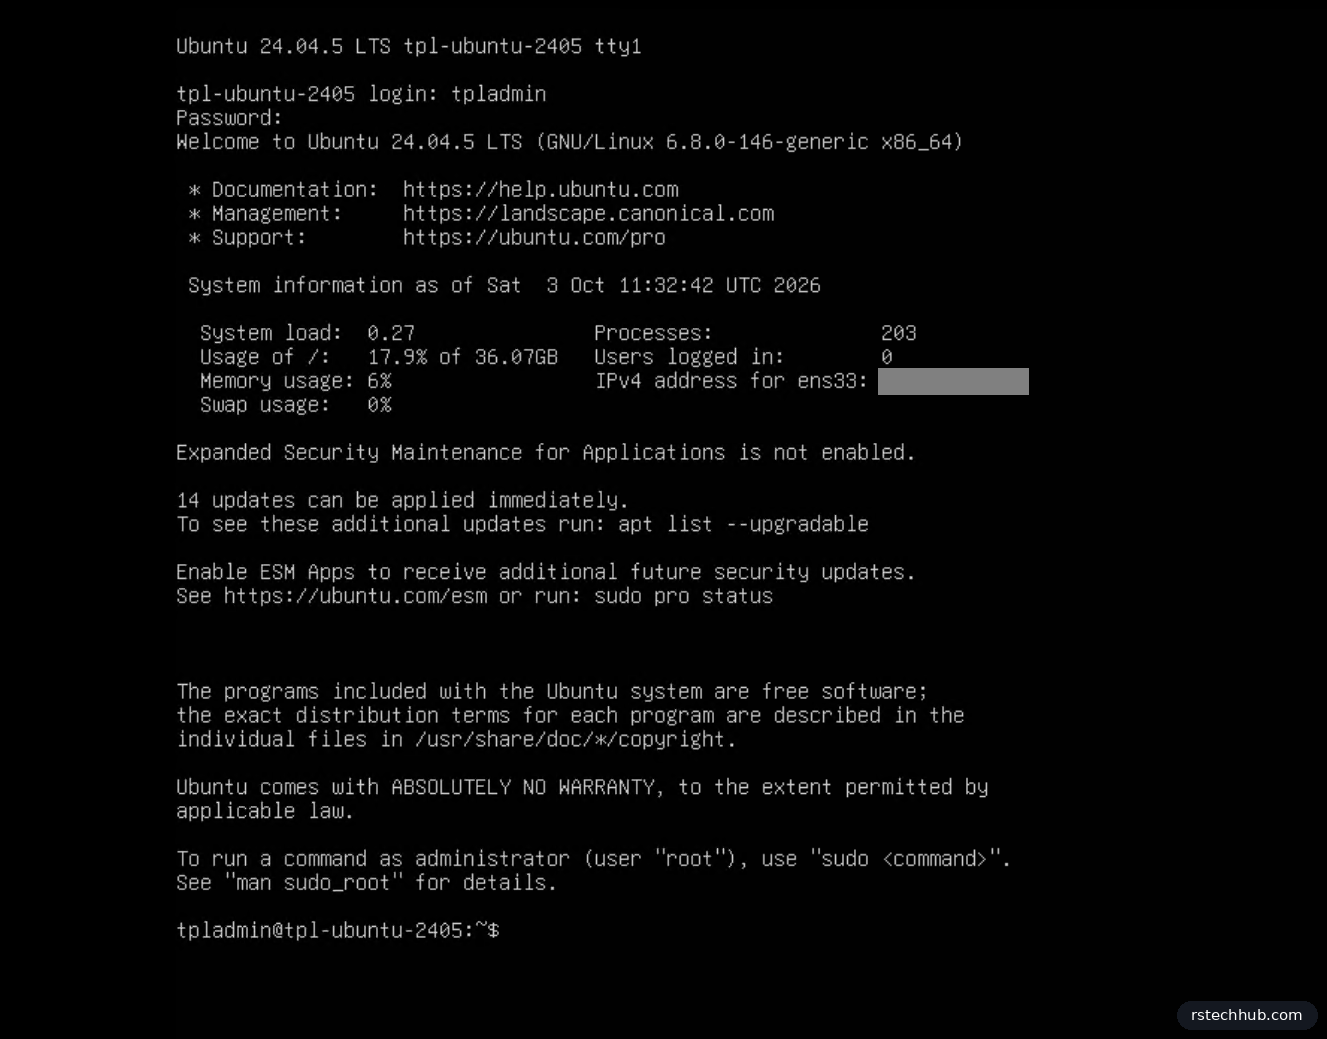
The vSphere web console has no paste, so from here I worked over SSH with PuTTY. Three things to do: time zone, the remaining updates, and a check that open-vm-tools is there. vCenter’s guest customization depends on it.
sudo timedatectl set-timezone Europe/London
sudo apt update && sudo apt -y full-upgrade
sudo apt install -y open-vm-tools
timedatectl | grep 'Time zone'
open-vm-tools is already the newest version (2:13.0.10-0ubuntu0.24.04.1).
0 upgraded, 0 newly installed, 0 to remove and 1 not upgraded.
Time zone: Europe/London (BST, +0100)The “1 not upgraded” is Ubuntu’s phased rollout holding a package back for a few days. Nothing to fix.
Step 5: Seal it
Sysprep does this for Windows. On Linux you clear out everything that should be unique per machine yourself. My script does it in one go and shuts the VM down at the end:
- Points systemd-timesyncd at the two domain controllers.
- Cleans apt caches and unused packages.
- Turns cloud-init off and removes the installer’s cloud-init files. In this lab vCenter customization names and addresses the clones through open-vm-tools, and I didn’t want two tools fighting over the network config.
- Deletes the installer’s DHCP netplan file, so each clone only has the static config the spec writes.
- Deletes the SSH host keys and adds a small first-boot service that generates new ones. Without it every clone would present the same host key.
- Empties
/etc/machine-id, which systemd regenerates on first boot. Clones sharing a machine-id can end up asking DHCP for the same lease. - Truncates logs and clears shell history.
The script is in my lab-tools repository on GitHub. Pass your NTP servers as arguments; without any it leaves time sync alone.
#!/usr/bin/env bash
# prepare-ubuntu-template.sh - seal an Ubuntu 24.04 VM before converting it to a vSphere template
#
# Usage (on the VM, as root):
#   sudo bash prepare-ubuntu-template.sh [ntp-server ...]
#   e.g. sudo bash prepare-ubuntu-template.sh dc01.example.internal dc02.example.internal
#
# Clones are expected to be named and addressed by a vCenter guest customization spec
# (open-vm-tools), so this script:
#   - points systemd-timesyncd at the NTP servers given (skipped if none)
#   - cleans apt caches and unused packages
#   - disables cloud-init and removes the installer's cloud-init and netplan files
#   - deletes the SSH host keys and adds a first-boot service that generates new ones
#   - empties /etc/machine-id so every clone gets its own
#   - truncates logs, clears temp files and shell history
#   - shuts the VM down
# Convert the VM to a template straight after. Do not power it on again first.
#
# Changes configuration and deletes data on the VM it runs on. Run it on the template VM only.
# https://rstechhub.com/core-infrastructure-part-8-ubuntu-template/   MIT licence
set -euo pipefail
[[ $EUID -eq 0 ]] || { echo "Run with sudo"; exit 1; }

if [[ $# -gt 0 ]]; then
  echo "== Time sync: $*"
  mkdir -p /etc/systemd/timesyncd.conf.d
  printf '[Time]\nNTP=%s\n' "$*" > /etc/systemd/timesyncd.conf.d/ntp.conf
else
  echo "== No NTP servers given, leaving timesyncd as it is"
fi

echo "== Packages"
apt-get -y autoremove --purge
apt-get clean
rm -rf /var/lib/apt/lists/*

echo "== cloud-init off (vCenter customization does the naming and IP)"
touch /etc/cloud/cloud-init.disabled
rm -f /etc/cloud/cloud.cfg.d/99-installer.cfg \
      /etc/cloud/cloud.cfg.d/90-installer-network.cfg \
      /etc/cloud/cloud.cfg.d/subiquity-disable-cloudinit-networking.cfg
cloud-init clean --logs || true

echo "== Remove the installer's network config (clones get theirs from the customization spec)"
rm -f /etc/netplan/50-cloud-init.yaml /etc/netplan/00-installer-config*.yaml

echo "== New SSH host keys on each clone's first boot"
rm -f /etc/ssh/ssh_host_*
cat > /etc/systemd/system/regen-ssh-host-keys.service <<'UNIT'
[Unit]
Description=Generate SSH host keys on first boot
ConditionPathExistsGlob=!/etc/ssh/ssh_host_*_key
Before=ssh.service

[Service]
Type=oneshot
ExecStart=/usr/bin/ssh-keygen -A

[Install]
WantedBy=multi-user.target
UNIT
systemctl enable regen-ssh-host-keys.service

echo "== Unique machine-id per clone"
truncate -s 0 /etc/machine-id
rm -f /var/lib/dbus/machine-id
ln -s /etc/machine-id /var/lib/dbus/machine-id

echo "== Logs, temp files, history"
journalctl --rotate && journalctl --vacuum-time=1s
find /var/log -type f \( -name '*.gz' -o -name '*.1' -o -name '*.old' \) -delete
find /var/log -type f -exec truncate -s 0 {} \;
rm -rf /tmp/* /var/tmp/*
rm -f /root/.bash_history /home/*/.bash_history

echo "== Done. Shutting down - convert to template next."
sleep 3
shutdown -h now
The VM can pull it straight from GitHub. I pasted it into nano over PuTTY the first time, which works just as well.
curl -fsSLO https://raw.githubusercontent.com/rstechhub/lab-tools/main/linux/prepare-ubuntu-template.sh
sudo bash prepare-ubuntu-template.sh dc01.example.internal dc02.example.internal
Output from my run:
== Time sync: dc01 dc02
== Packages
0 upgraded, 0 newly installed, 0 to remove and 1 not upgraded.
== cloud-init off (vCenter customization does the naming and IP)
== Remove the installer's network config
== New SSH host keys on each clone's first boot
Created symlink /etc/systemd/system/multi-user.target.wants/regen-ssh-host-keys.service
== Unique machine-id per clone
== Logs, temp files, history
No journal files were found.
== Done. Shutting down - convert to template next.

The system will power off now!
Once it shows powered off: right-click, Template, Convert to Template. Don’t power it on again before converting, or the first boot regenerates everything the script just cleared.
Step 6: The customization spec
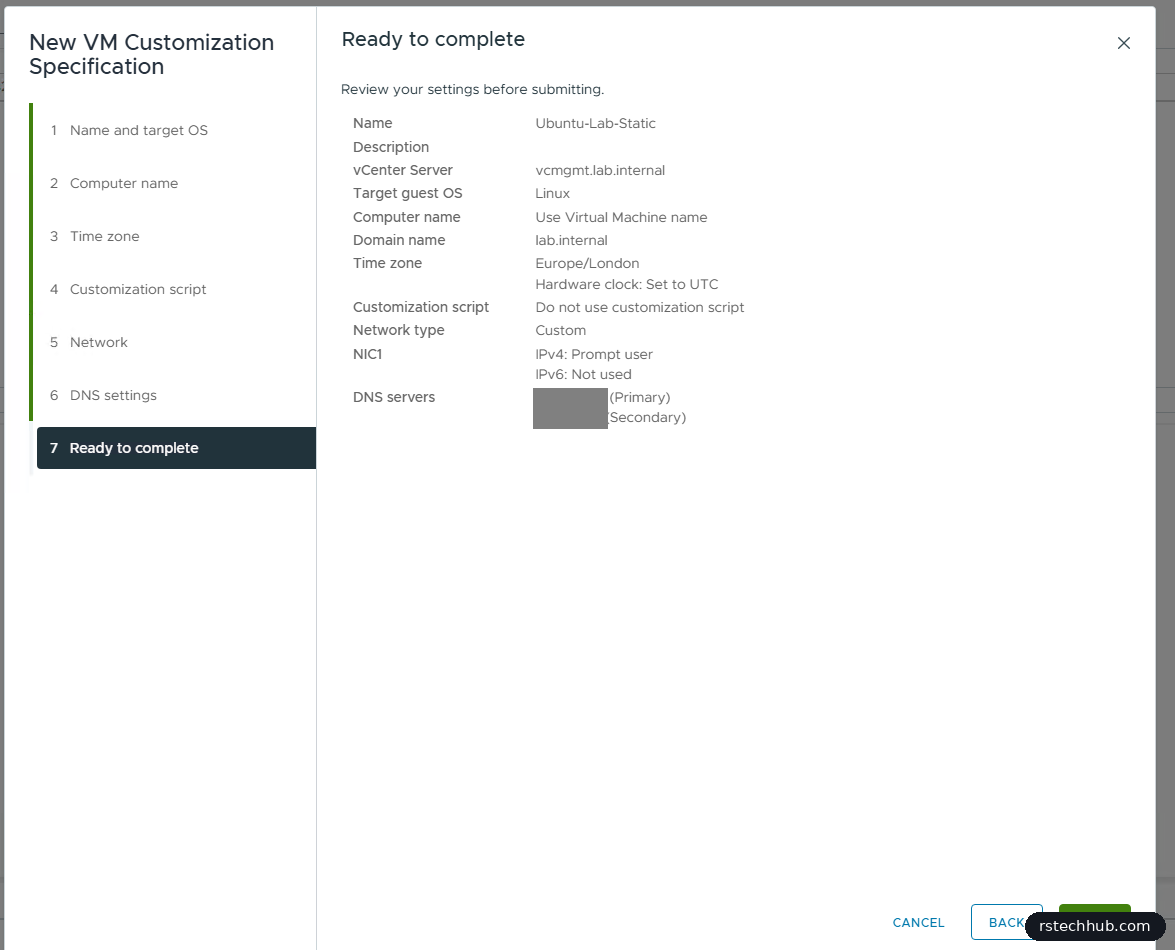
Policies and Profiles, VM Customization Specifications, New. A Linux spec has fewer pages than the Windows one from Part 7: no SID, no licence, no domain join.
| Page | Setting |
|---|---|
| Name and target OS | Ubuntu-Lab-Static, Linux |
| Computer name | Use the virtual machine name, domain set to the AD domain |
| Time zone | Europe/London, hardware clock UTC |
| Network | NIC1: prompt for the IPv4 address at deploy, fixed mask and gateway, no IPv6 |
| DNS | Both domain controllers, search path set to the AD domain |
Using the VM name as the hostname means one less thing to type and one less thing to get wrong: whatever I call the VM in vCenter is what it calls itself.
Step 7: First deploy
Right-click the template, New VM from This Template. On the clone options page tick all three boxes: customize the operating system, customize the hardware, and power on after creation. Pick Ubuntu-Lab-Static, type the IP when it asks, and that’s it. My first clone is labtools01, the build box for the VCF hosts.
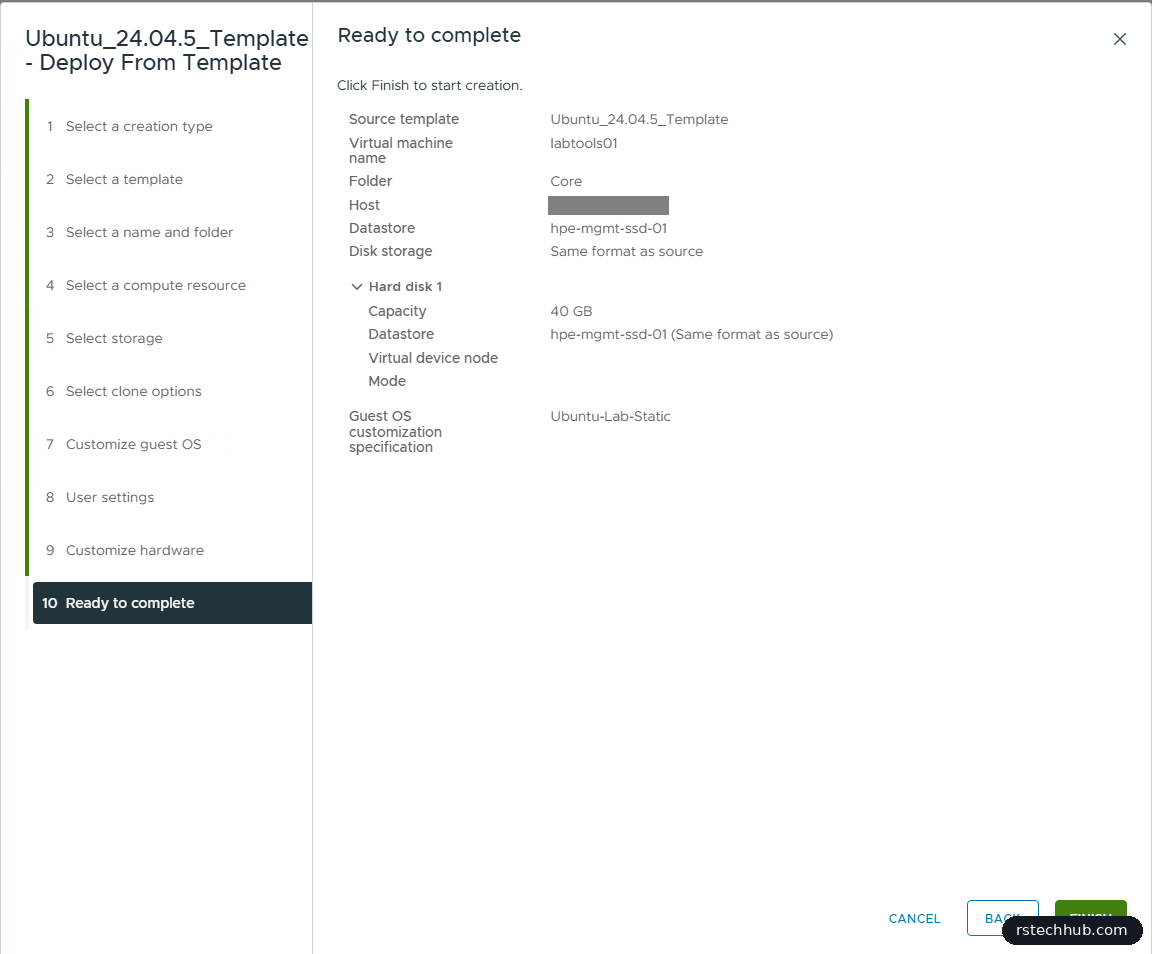
I left the second disk off. labtools01 will also host the VCF offline depot, and that’s bulk data I don’t want on SSD, so it’ll live on the TrueNAS box when I get to it.
The VM powers on, the customization runs, and it reboots once by itself. A couple of minutes later it answered on its new name. PuTTY warned me about an unknown host key, which is exactly what I wanted to see: the clone made its own. Then the checks:
hostname -f
ip -br a
resolvectl status | grep -E 'DNS Servers|DNS Domain'
cat /etc/machine-id
ls /etc/ssh/ssh_host_*_key.pub
timedatectl timesync-status | grep Server
labtools01.lab.example
ens33 UP x.x.x.13/24
DNS Servers: x.x.x.20 x.x.x.21
887b2d18c5d964b00fdf9c0a6ac0f77d
/etc/ssh/ssh_host_ecdsa_key.pub /etc/ssh/ssh_host_ed25519_key.pub /etc/ssh/ssh_host_rsa_key.pub
Server: x.x.x.20 (dc01)Hostname from the VM name, static IP, both DNS servers, a new machine-id, new SSH host keys and time from the domain controller. One thing was missing: there was no DNS Domain line, so no search domain. The netplan file the customization engine wrote confirmed it:
# Generated by VMWare customization engine.
network:
  version: 2
  renderer: networkd
  ethernets:
    ens33:
      dhcp4: no
      dhcp6: no
      addresses:
        - x.x.x.13/24
      routes:
        - to: default
          via: x.x.x.1
      nameservers:
        addresses:
          - x.x.x.20
          - x.x.x.21
My fault, not vCenter’s. On the spec’s DNS page you type the search path and then have to click Add; I typed it and went straight to Next, so it never saved. The summary page doesn’t list search paths either, which is why I didn’t spot it. I fixed the spec for future clones, and patched labtools01 by hand:
f=$(ls /etc/netplan/*.yaml)
sudo sed -i '/^          - x.x.x.21$/a\        search:\n          - lab.example' "$f"
sudo netplan apply
resolvectl domain
Global:
Link 2 (ens33): lab.exampleBefore the deploy I created the DNS records for the new VM, and hit another gotcha worth knowing. The A, PTR and CNAME records went in on dc01 without a complaint, yet Resolve-DnsName said the name didn’t exist. My lookup had gone to dc02 before the records replicated, and dc02 cached that “doesn’t exist” answer. Even after replication finished it kept serving it. Two commands on dc02 sorted it:
repadmin /syncall /Ade
Clear-DnsServerCache -Force; Clear-DnsClientCache
Watch the switches: /P pushes changes out from the DC you run it on. Run on dc02 with /P, it sent dc02’s changes to dc01, the opposite of what I needed.
Gotchas
- Save
SHA256SUMSproperly, or your hash check compares against nothing. - Check the root LV size on the storage summary. On large disks the default leaves space unallocated.
- The web console has no paste. Get SSH working early and do the rest from there.
- Don’t boot the template after sealing it.
- On the spec’s DNS page, click Add after typing the search path. The summary won’t show you if it’s missing.
- New DNS records can look missing because of a cached negative answer on the other DC.
What’s next
labtools01 is the first VM from this template. It becomes the build box for the VCF 9 hosts: it builds a kickstart ISO per host, serves it to the iDRACs, and later holds the VCF offline depot.