
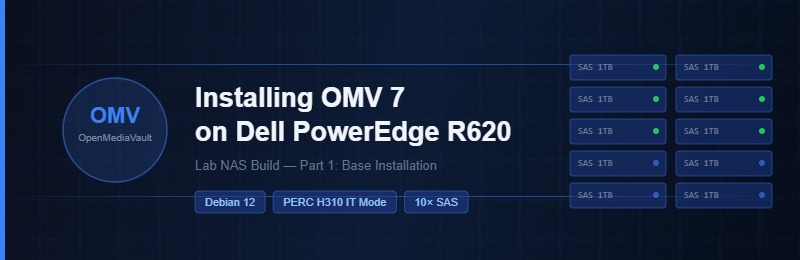
The Dell PowerEdge R620 sits at the back of my lab rack doing one thing: storage. Twelve drive bays, a flashed-to-IT-mode PERC H310, and ten 1 TB SAS spinners make it a solid NAS candidate. OpenMediaVault (OMV) is my NAS OS of choice — Debian under the hood, web UI on top, no licensing fees, and a plugin ecosystem that covers everything from ZFS to Docker.
This is Part 1: the base installation. Part 2 will cover performance tuning, SMART monitoring, SMB/NFS shares, and Docker via the OMV-Extras plugin.
Lab Hardware
| Server | Dell PowerEdge R620 |
| CPU | 2× Intel E5-2640 · 6C/12T · 2.50GHz |
| Memory | 384 GB DDR3 |
| Boot | Dell BOSS Card · 2× M.2 SATA (mirrored) |
| HBA | Dell PERC H310 Mini flashed to IT Mode (LSI 9211-8i firmware) |
| NIC | Dell Intel X520 + I350 · 2× 10GbE SFP+ / 2× 1GbE RJ45 · Quad-port NDC |
| Drives | 10× 1 TB SAS (data pool) |
What You’ll Need
- OpenMediaVault 7.x ISO — download from openmediavault.org
- USB drive (4 GB+) or iDRAC virtual media
- Rufus (Windows) or
dd/ balenaEtcher (Linux/Mac) to write the ISO - Network cable connected to one of the 1GbE RJ45 ports (use the I350 ports for initial setup)
- A dedicated OS disk — I’m using the BOSS card M.2 SATA, keeping all SAS bays free for data
Step 1 — Write the Installation Media
On Windows with Rufus: select the OMV ISO, partition scheme MBR, target system BIOS (or UEFI if your R620 firmware supports it — the R620 does support UEFI boot). Write in DD Image mode when prompted.
On Linux:
# Find your USB device first
lsblk

# Write the ISO (replace sdX with your USB device)
sudo dd if=openmediavault_7.x-amd64.iso of=/dev/sdX bs=4M status=progress oflag=sync
Step 2 — BIOS & Boot Configuration
On the R620, enter System Setup (F2 at POST) and configure:
- Boot Mode: UEFI or BIOS — either works. I use BIOS legacy for compatibility.
- Boot Sequence: Move USB / virtual media to the top, or use the one-time boot menu (F11) for the install.
- SATA Mode: If using the BOSS card, ensure the internal M.2 slot is enabled under Integrated Devices → SATA Settings.
- Secure Boot: Disable it. OMV’s installer won’t fight you but it’s one less variable.
Step 3 — Install OpenMediaVault
BootBoot from the USB or virtual media. You’ll get the OMV GRUB menu — select Install (not graphical install, they’re functionally identical but the text installer is faster on server hardware).
Language & LocaleSelect your language, country, and keyboard layout. These only affect the installer display — OMV itself is always en-US in the web UI.
NetworkThe installer will detect your NICs. On the R620 with the Intel X520 + I350 NDC, the I350 1GbE ports (typically em1 / em2 in older kernels, or eno1 / eno2 in newer ones) show up first. Pick one, let it DHCP, or enter a static IP. You can change this later in the web UI — just make sure you can reach the box post-install.
Set a hostname. I use r620-nas. Keep it short, no dots.
Set a strong root password. This is for SSH and the console — the OMV web UI uses a separate admin account.
This is critical. The installer shows all available disks. Select your BOSS card M.2 — it typically appears as /dev/sda if it’s the first SATA device. Do not select any of your data SAS drives. Double-check the size — the BOSS card M.2 will be smaller (typically 240 GB or 480 GB) versus the 1 TB SAS spinners.
Select a Debian mirror close to your region. This pulls the base packages during install. The UK mirror (ftp.uk.debian.org) or Cloudflare (deb.debian.org) both work well.
Install GRUB to the BOSS card (/dev/sda or whichever disk you selected for the OS). Confirm and let the installer finish.
Step 4 — First Boot
Remove the USB once the installer reboots. OMV will boot from the BOSS card. You’ll land at a login prompt with the server’s IP address displayed — this is what you need for the web UI.
If the IP isn’t displayed or you need to check:
# Log in as root, then check the assigned IP
ip a

# Or check which interface is up
ip link show
Step 5 — Access the Web UI
From any machine on the same network, open a browser and go to:
http://<your-r620-ip>Default credentials:
- Username:
admin - Password:
openmediavault
Change the admin password immediately — go to User Management → Users → admin → Edit and set a new one.
Step 6 — System Updates
Before doing anything else, update the system. In the web UI: System → Update Management → Updates, then click Check and install all pending updates. Or from the command line:
apt update && apt upgrade -yReboot after updates if the kernel was updated:
rebootStep 7 — Verify Your Drives Are Visible
Go to Storage → Disks. With the PERC H310 in IT Mode, you should see all 10 SAS drives listed as individual disks (/dev/sdb through /dev/sdk or similar), not as a single RAID volume. If you only see one large virtual disk, the HBA is still in RAID mode.
What’s Next
Part 2 will cover the full configuration and tuning of OMV on this hardware — storage pool setup with mergerfs + SnapRAID (or ZFS if you prefer), share configuration, network tuning for the 10GbE X520 ports, and setting up the OMV-Extras plugin for Docker and Portainer.
Next in this series
Part 2 — Kernel, ZFS & 10Gb Networking →